1878 Golding Jobber restoration
Here are some pictures of the press in the “before stage”. It is in pretty typical condition for a press 143 years old. Things happened and parts get broken, get repaired, and parts get removed and lost, etc. Dealing with these kind of issues is just part of the restoration process. In this case there are no donor presses or replacement parts available, so if it is broken it needs to be repaired. If it is missing it needs to be recreated. And if it was already repaired, but poorly, it needs to be corrected. This design Jobber was not seen before this one surfaced. The design was changed very quickly to the more familiar solid body press that everyone thinks of when talking about a Golding Jobber.
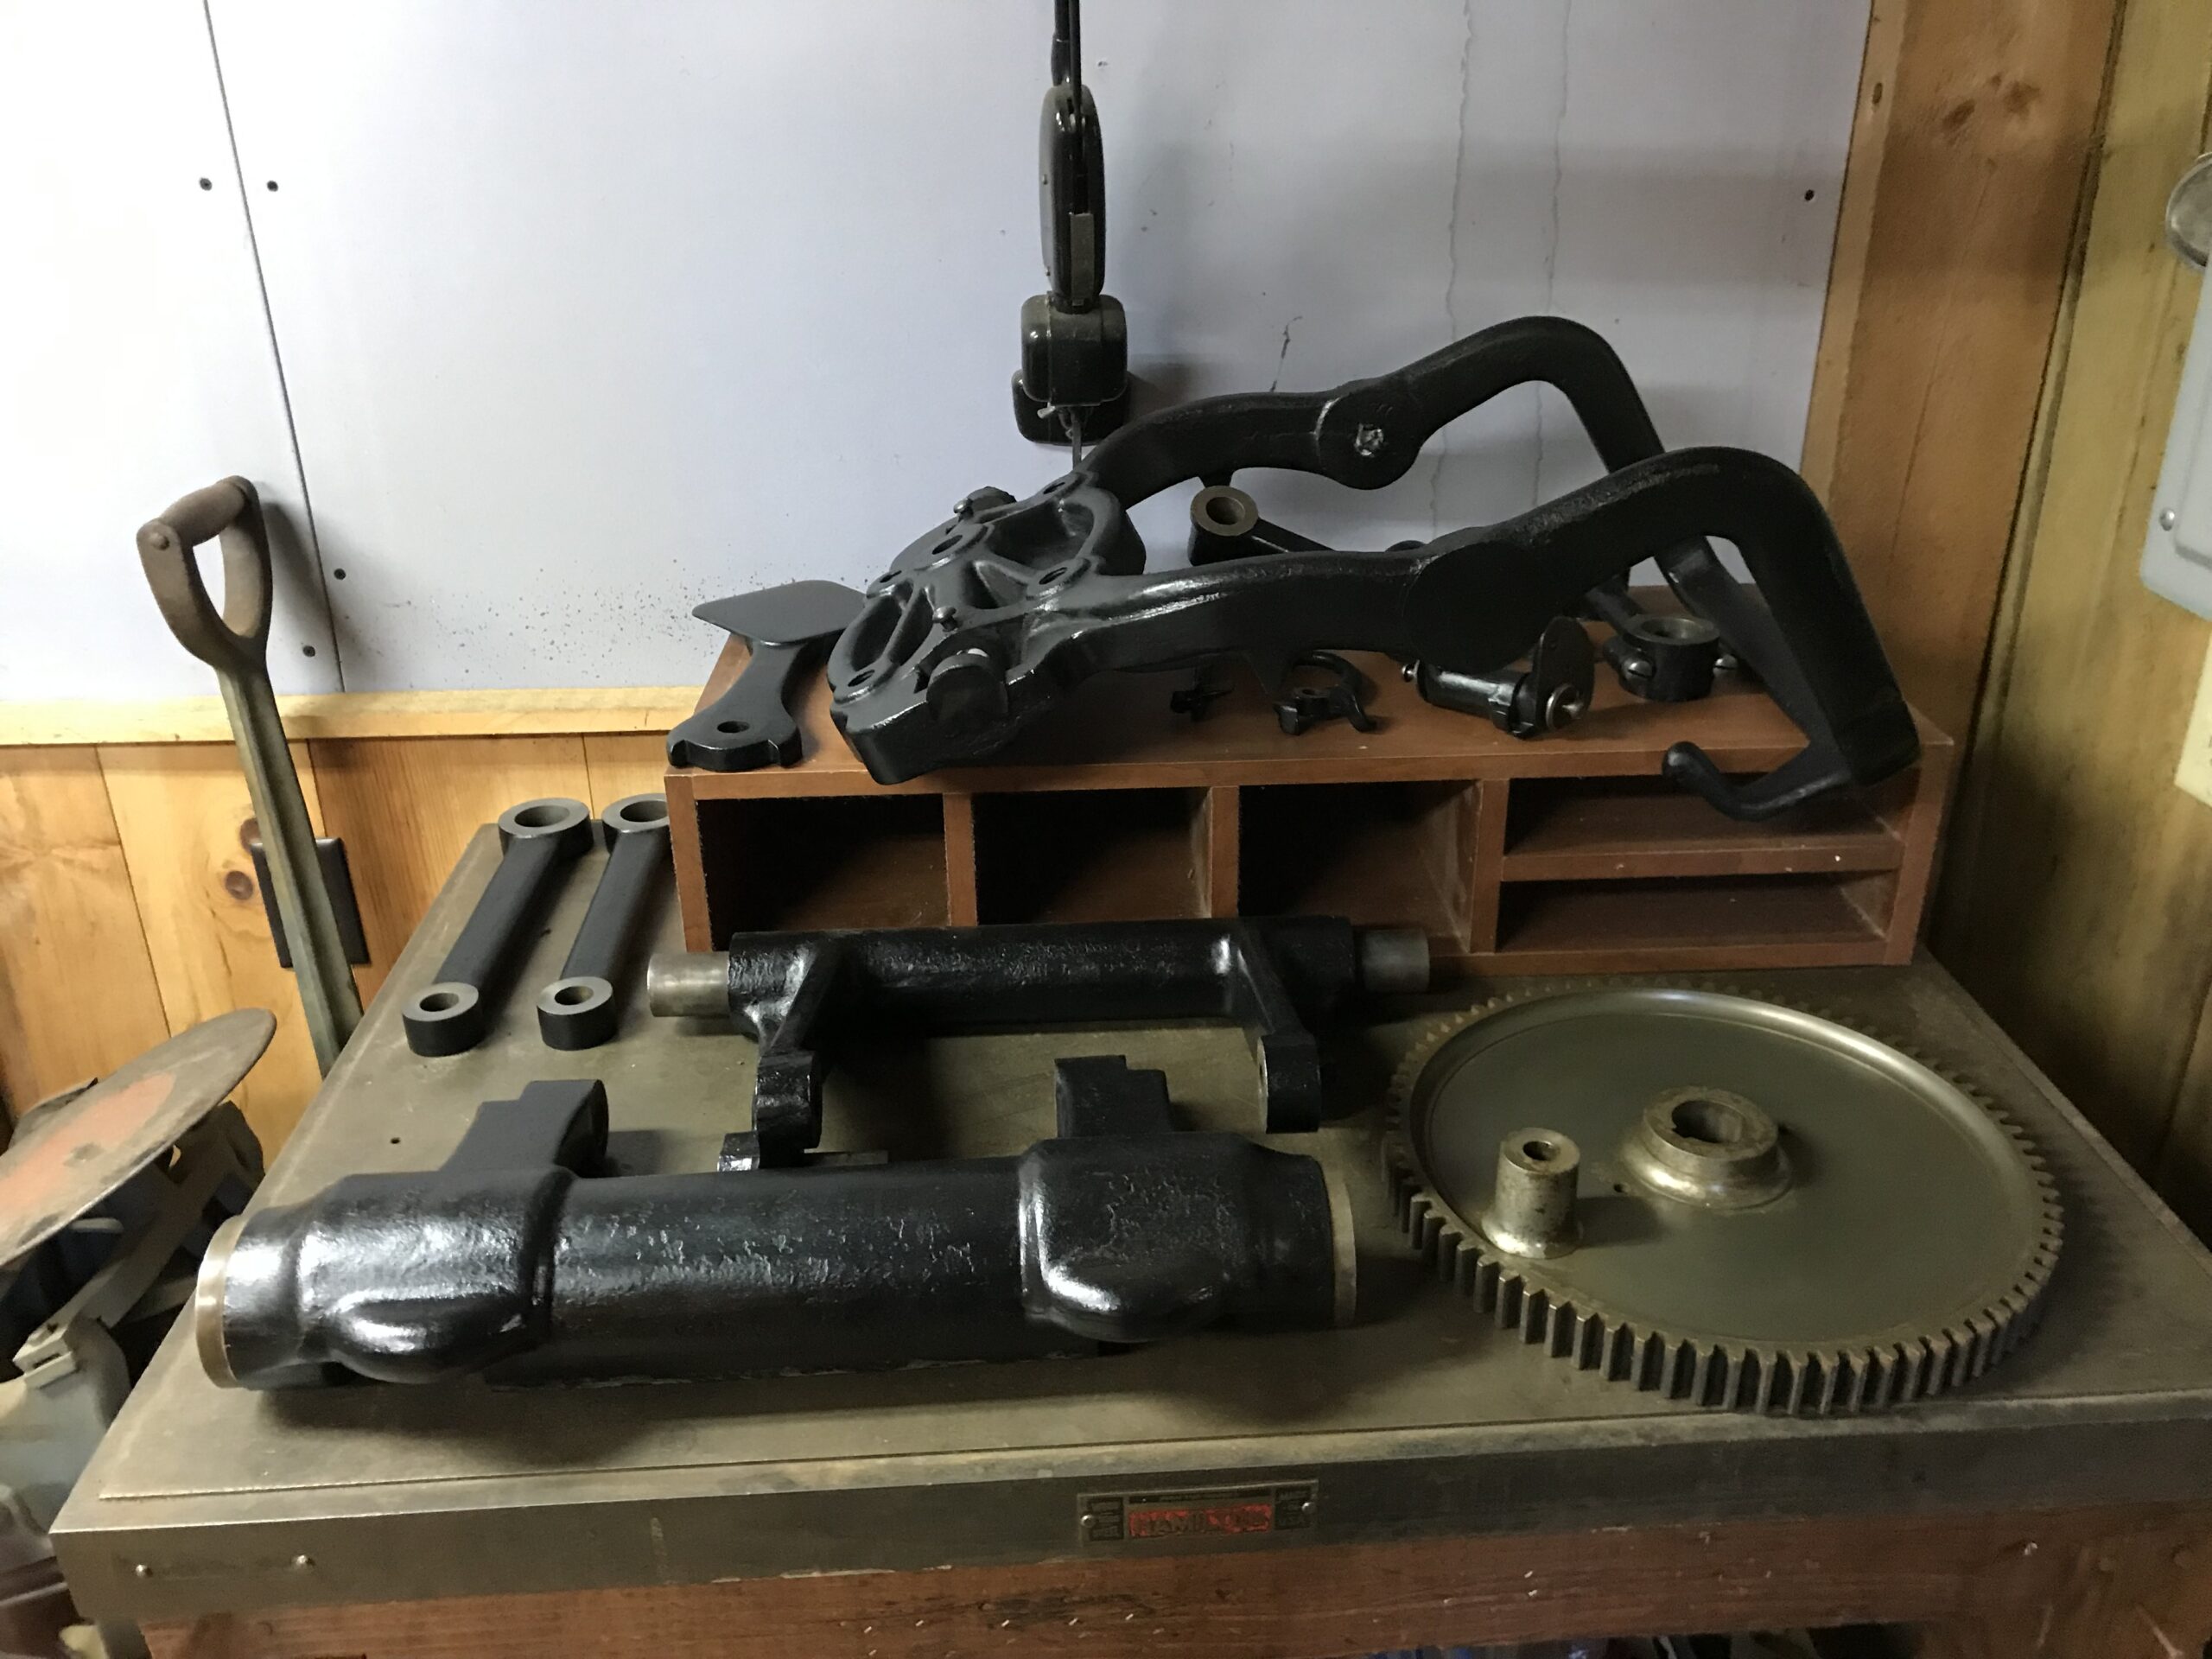
Picture 1 shows the throw off mechanism(upper left) that I need to figure out. It also shows the gripper finger rod mounting tabs on the platen are completely broken off making the grippers non functioning and will need repair.
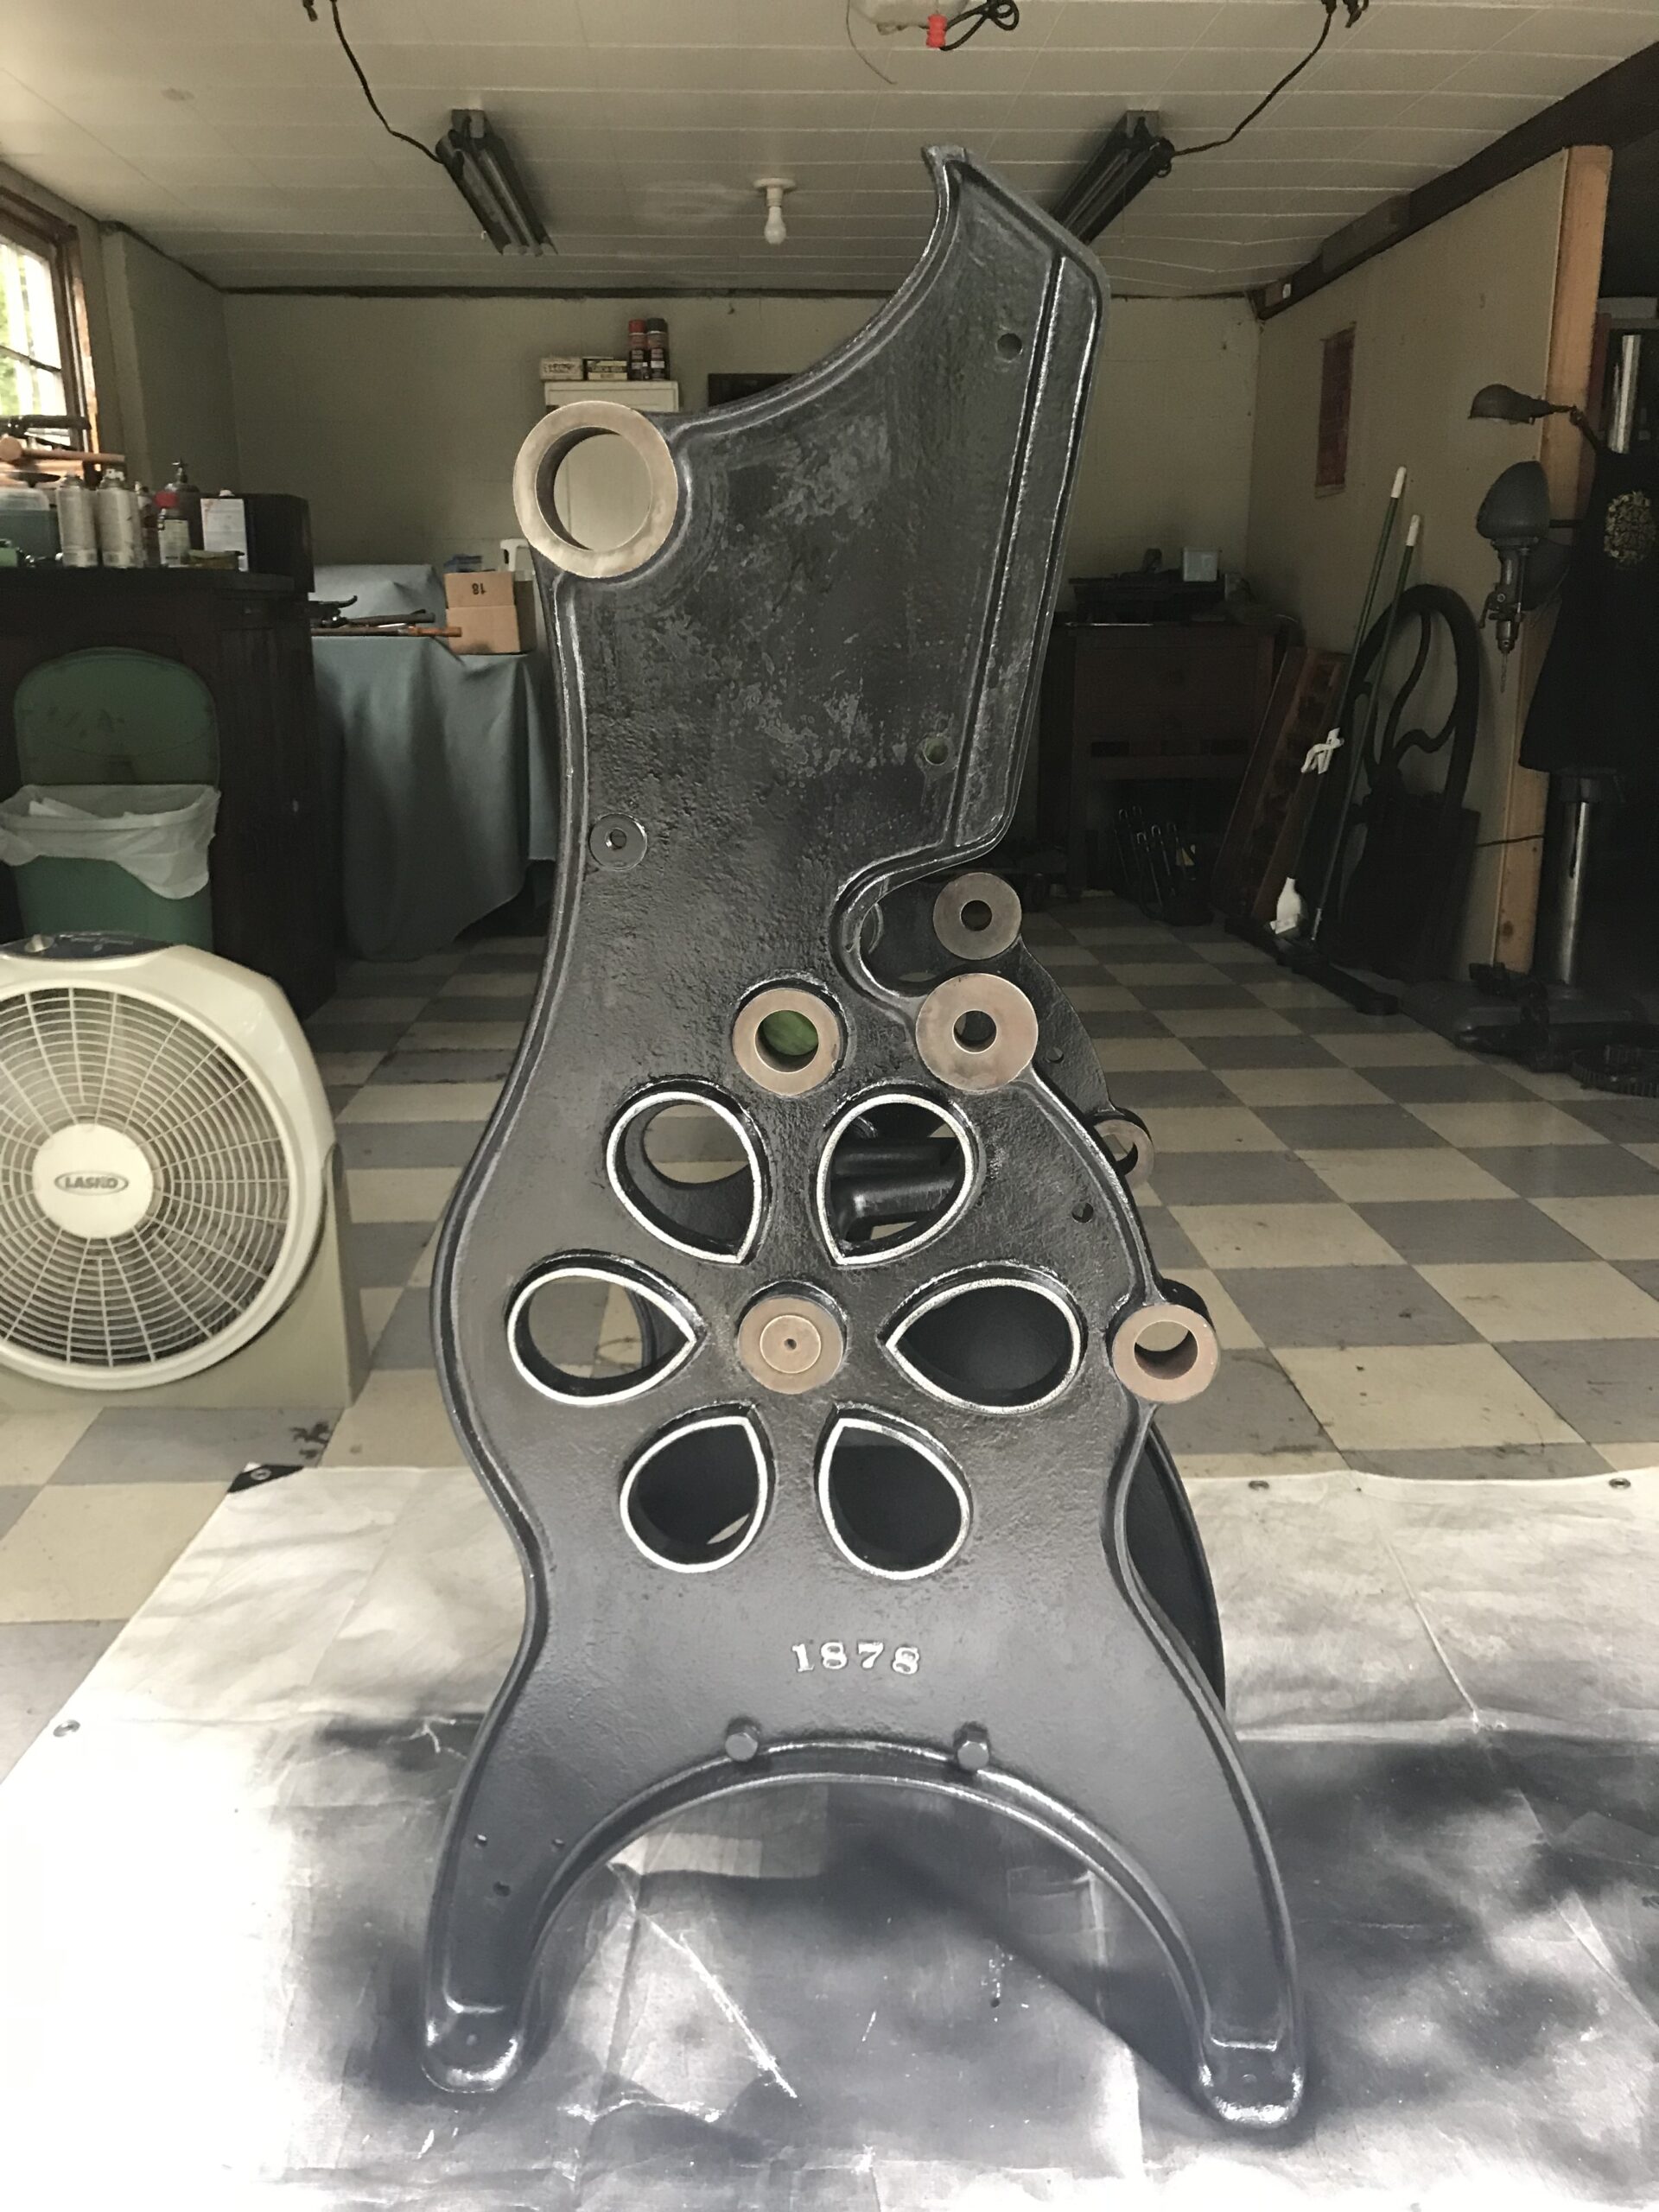
Picture 2 shows the date of manufacture cast into the body of the press. A feature found on many early Golding presses.
Picture 3 shows the open platen with traditional adjustment using four bolts in each corner and one center bolt to actually attach the platen to the rocker. This example is before springs were used on the center bolt. It has a piece of leather instead.
Picture 4 shows the adjustable treadle. It can be rotated left or right to allow the use of either foot without moving your position from the centerline of the press. I have never seen another press with this feature. It also shows the treadle connection rod is bent and will need straightening.
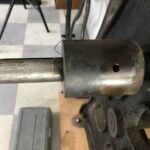
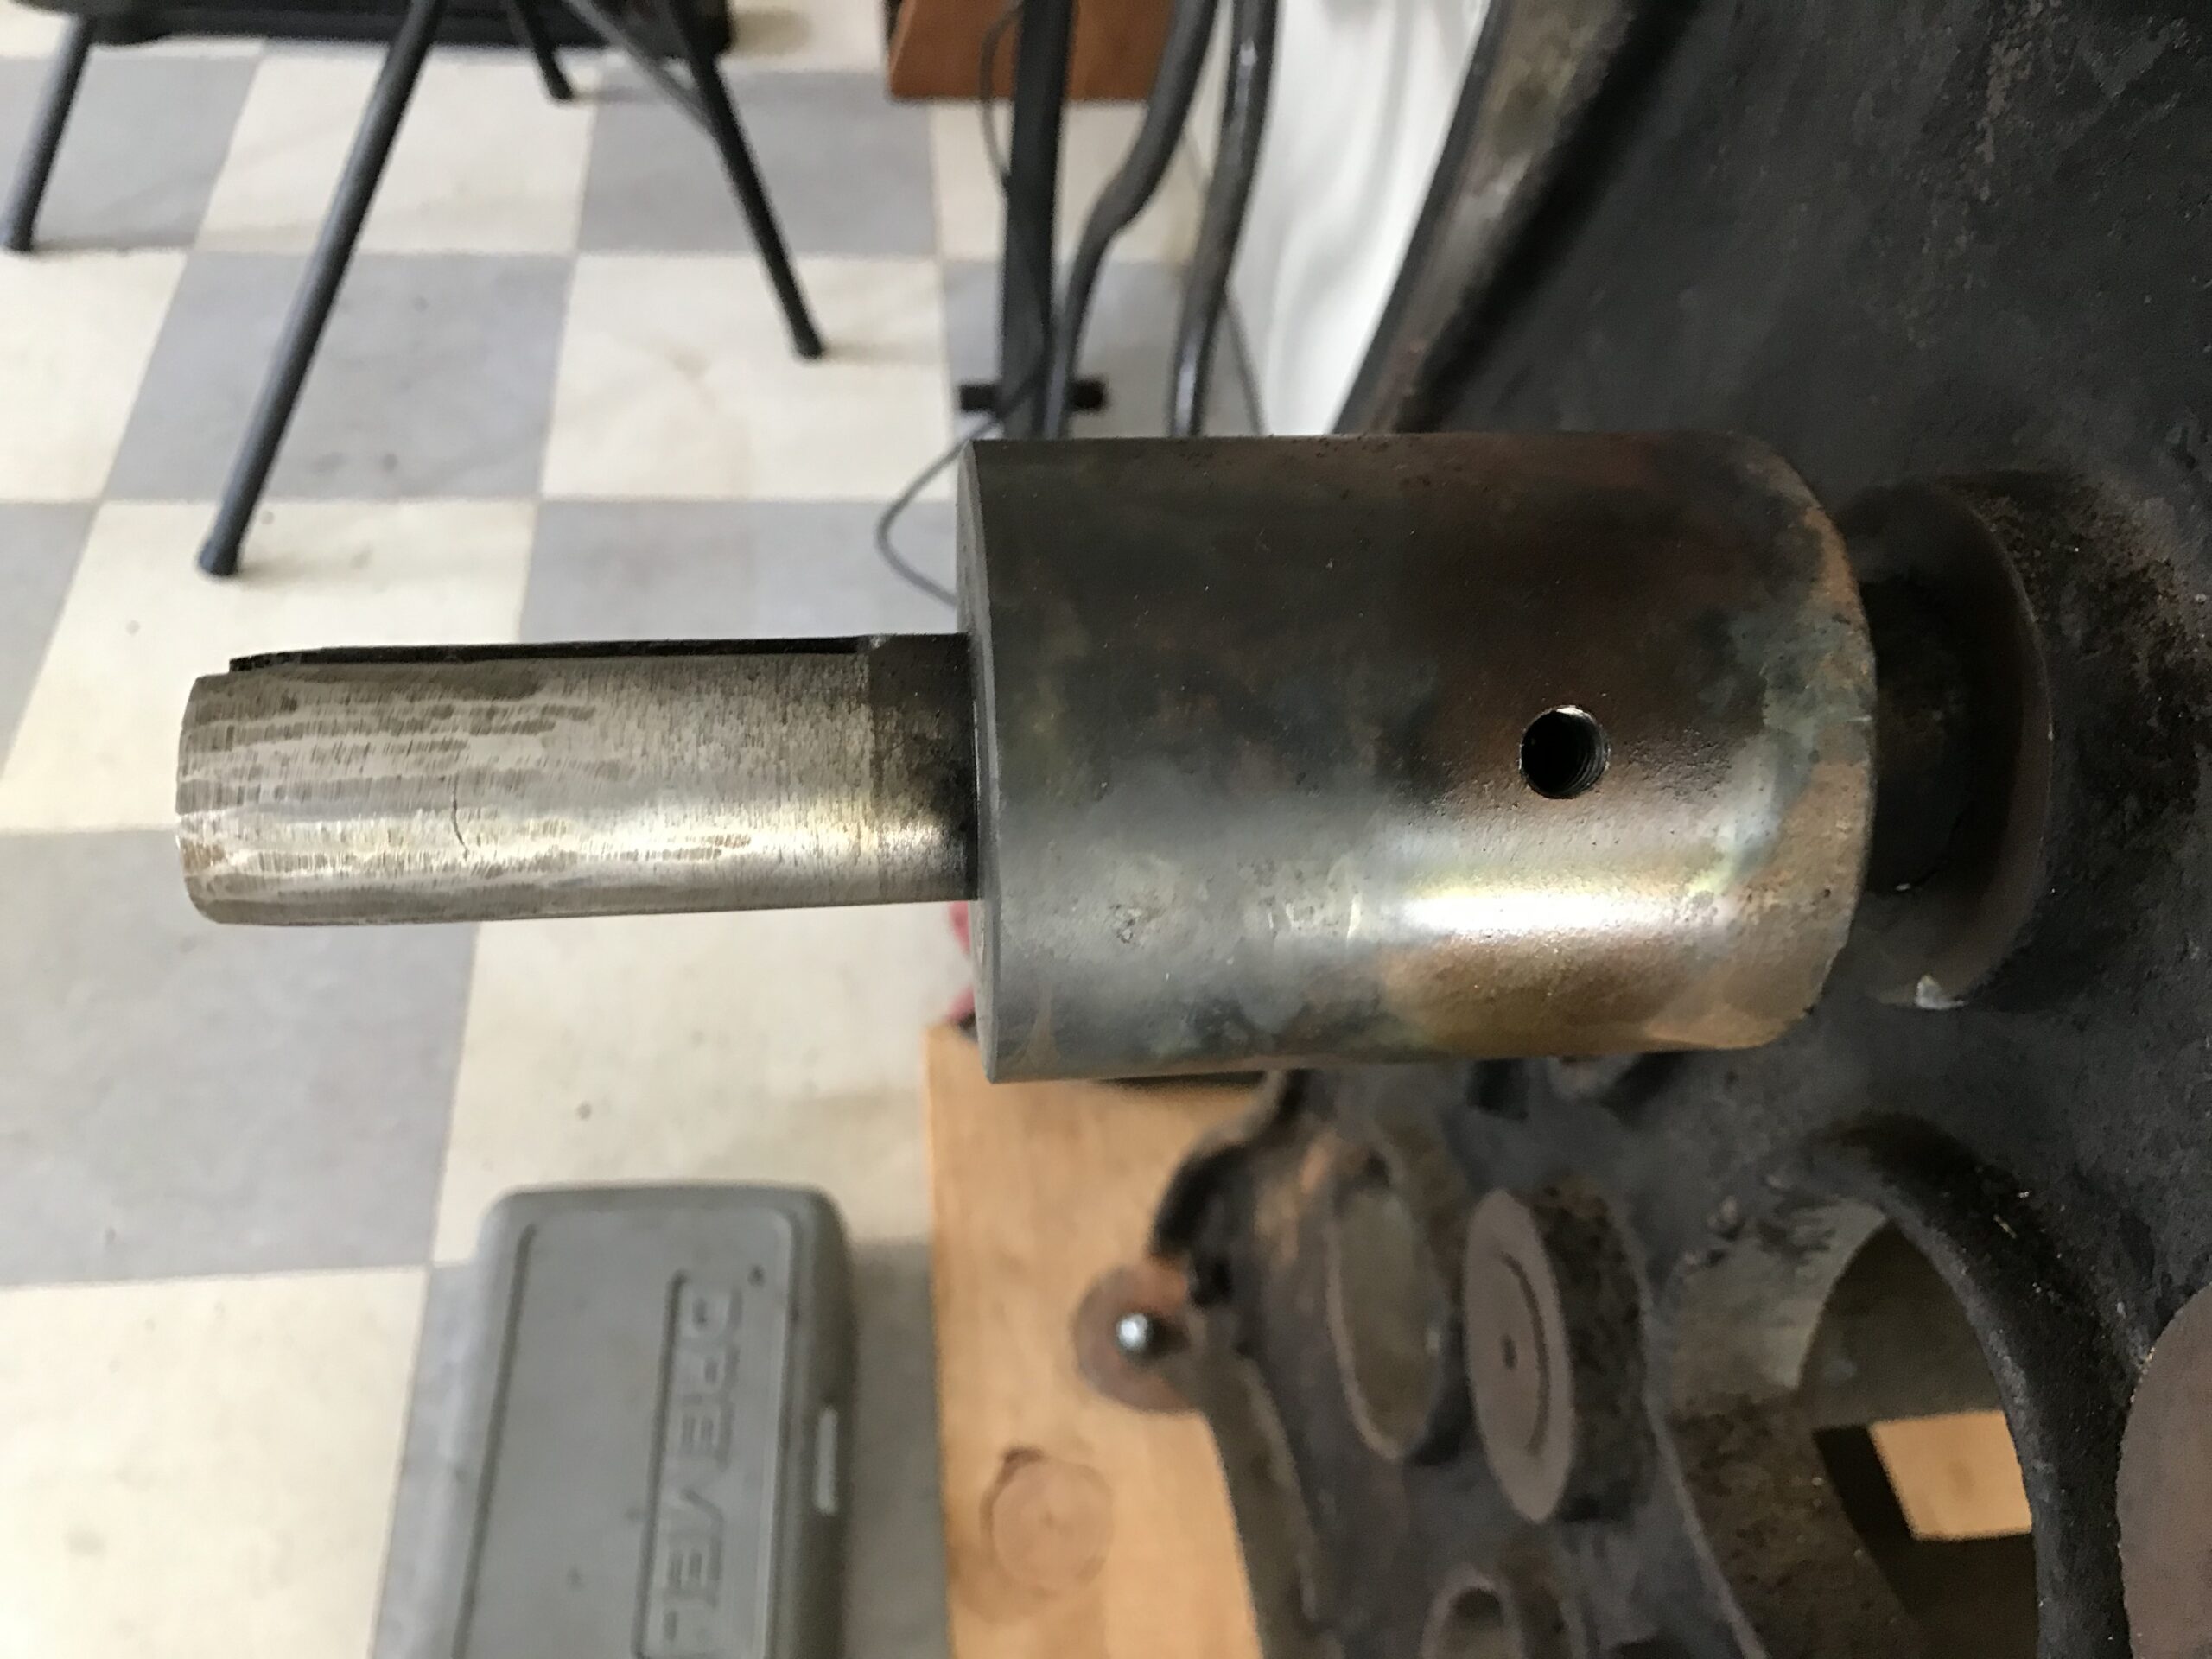
Picture 5 shows a repair coupling for the flywheel. Some major accident occurred in the past that broke off the flywheel driveshaft on both sides of the press. The flywheel side received the coupling seen, and the pinion gear side was drilled and tapped to hold the gear on. Both of these repairs will be upgraded for strength and aesthetics.
Picture 6 shows a closeup of the unusual throw off mechanism(what is left of it)
Picture 7 shows the right side of the press and the broken shaft where the pinion gear mounts can be seen above the bull gear.
It’s pretty unusual to have the original bill of sale stay with the press. Here is another image of it you can click on to enlarge and read. 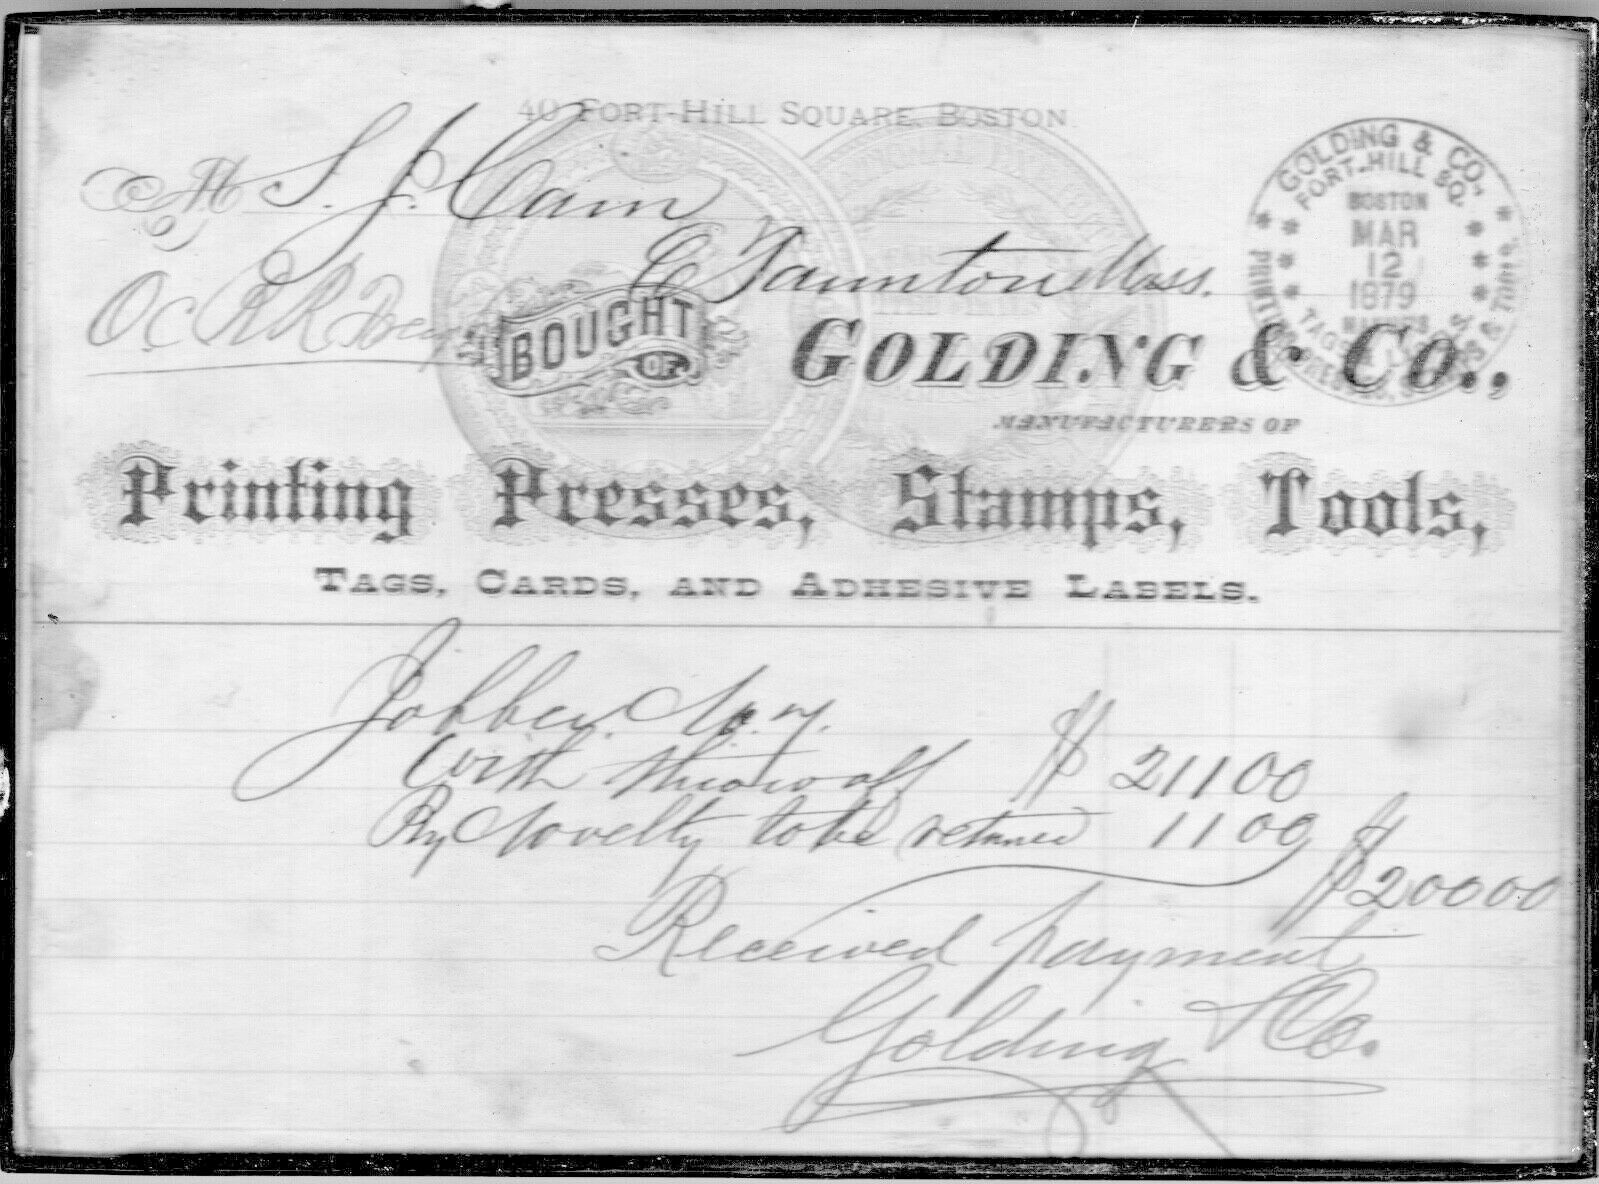
One of the first things I did was research Golding company records being held at Harvard Universities Houghton Library. This occurred during the height of Covid lock down so the library was only open to email requests. Online research showed they had catalogs from 1877 and 1879, but not 1878 the actual year this press was manufactured. I figured there was high probability that the 1877 catalog would picture this press and still possible from the 1879 one, so I asked for any pictures or text of the Jobber no. 7. They warned me of very long lead times because of the situation. They also warned that if the catalogs were too delicate to scan, they would not be able to fulfill my request. I put the project on hold and waited. About 6 months later, when I had almost given up an email arrived from Houghton Library. I was nervous as I opened it as it had attachments that might be what I had hoped were going to help solve the mystery. Success! The 1877 catalog showed the exact press. Without this image I would be at a total loss as to the throw off lever mechanism. Before getting the email I had tried to envision what the missing parts might look like. I was not even close. I had a lever pivoting on the flywheel shaft with a rod to the actual mechanism in the back of the press.
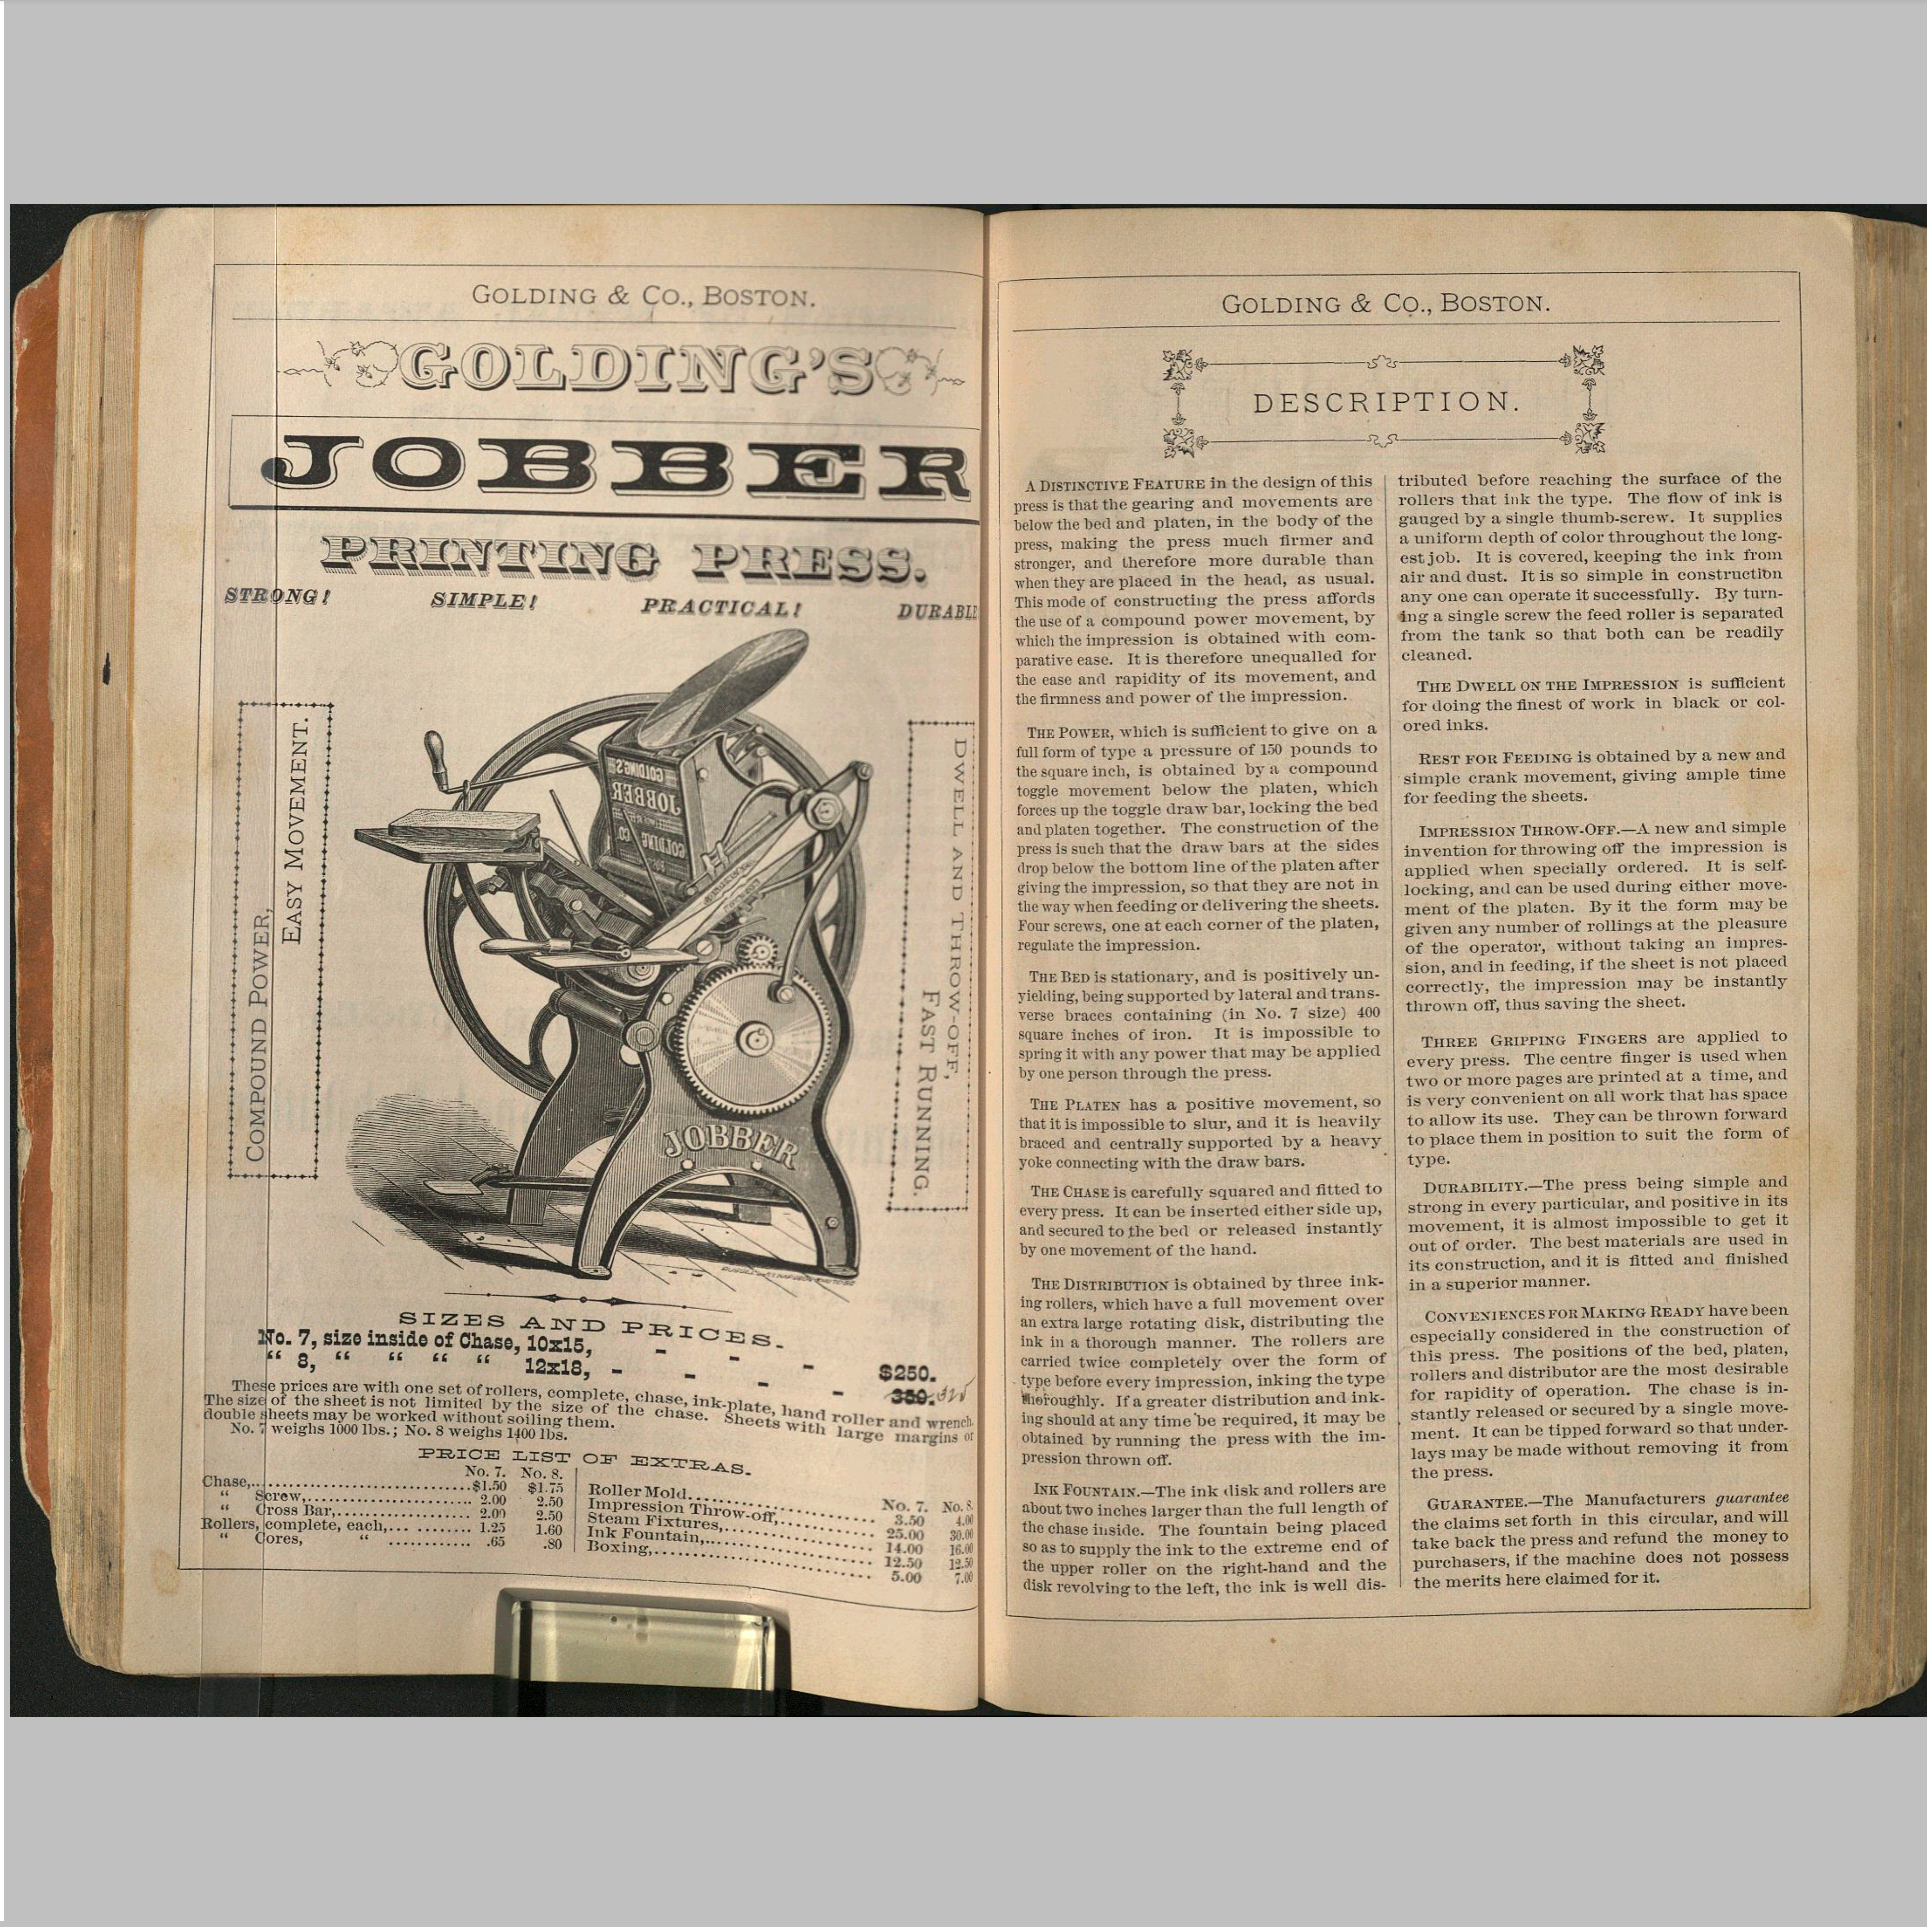
 Looking at the image of the throw off in the catalog,
  it seemed like recreating the missing parts would be very doable. A rod from a handle to the back of the press, and a new piece to support the rod that mounts to the left delivery board support arm. I carved a wood support arm and took it to the foundry to be cast out of bronze. I took 3/8″rod and heated it and put a 90 degree bend in it and added 3/8-16 threads. I wanted the handle to look appropriate to the press. I decided an old file handle fit the design well. The other end of the rod got a coupling and eye bolt which attached to the mechanism with a shoulder bolt. This looks pretty close to what Golding designed for the press and it works better than I thought it would. It is not robust by any means, but, as a hobbyist, I will likely not put it under any stress.
 Prior to actually working on the throw off, I had to disassemble the press of course. One part gave me a lot of trouble. The flywheel shaft repair coupling was heat shrunk onto what remained of the crankshaft. When I say heat shrunk, I really mean it. A propane torch couldn’t come close to putting enough heat in the coupling to get it to budge. I asked a friend to bring over his acetylene torch. In addition, we had to drill the center of the extension for the flywheel from the coupling and tap it so we could use a bolt to act as a puller. The combination of constant heating with the torch, and a ratchet with extension handle on the bolt finally did the trick. Needless to say, I will not be using this repair part without modification to make taking the flywheel on and off much easier.
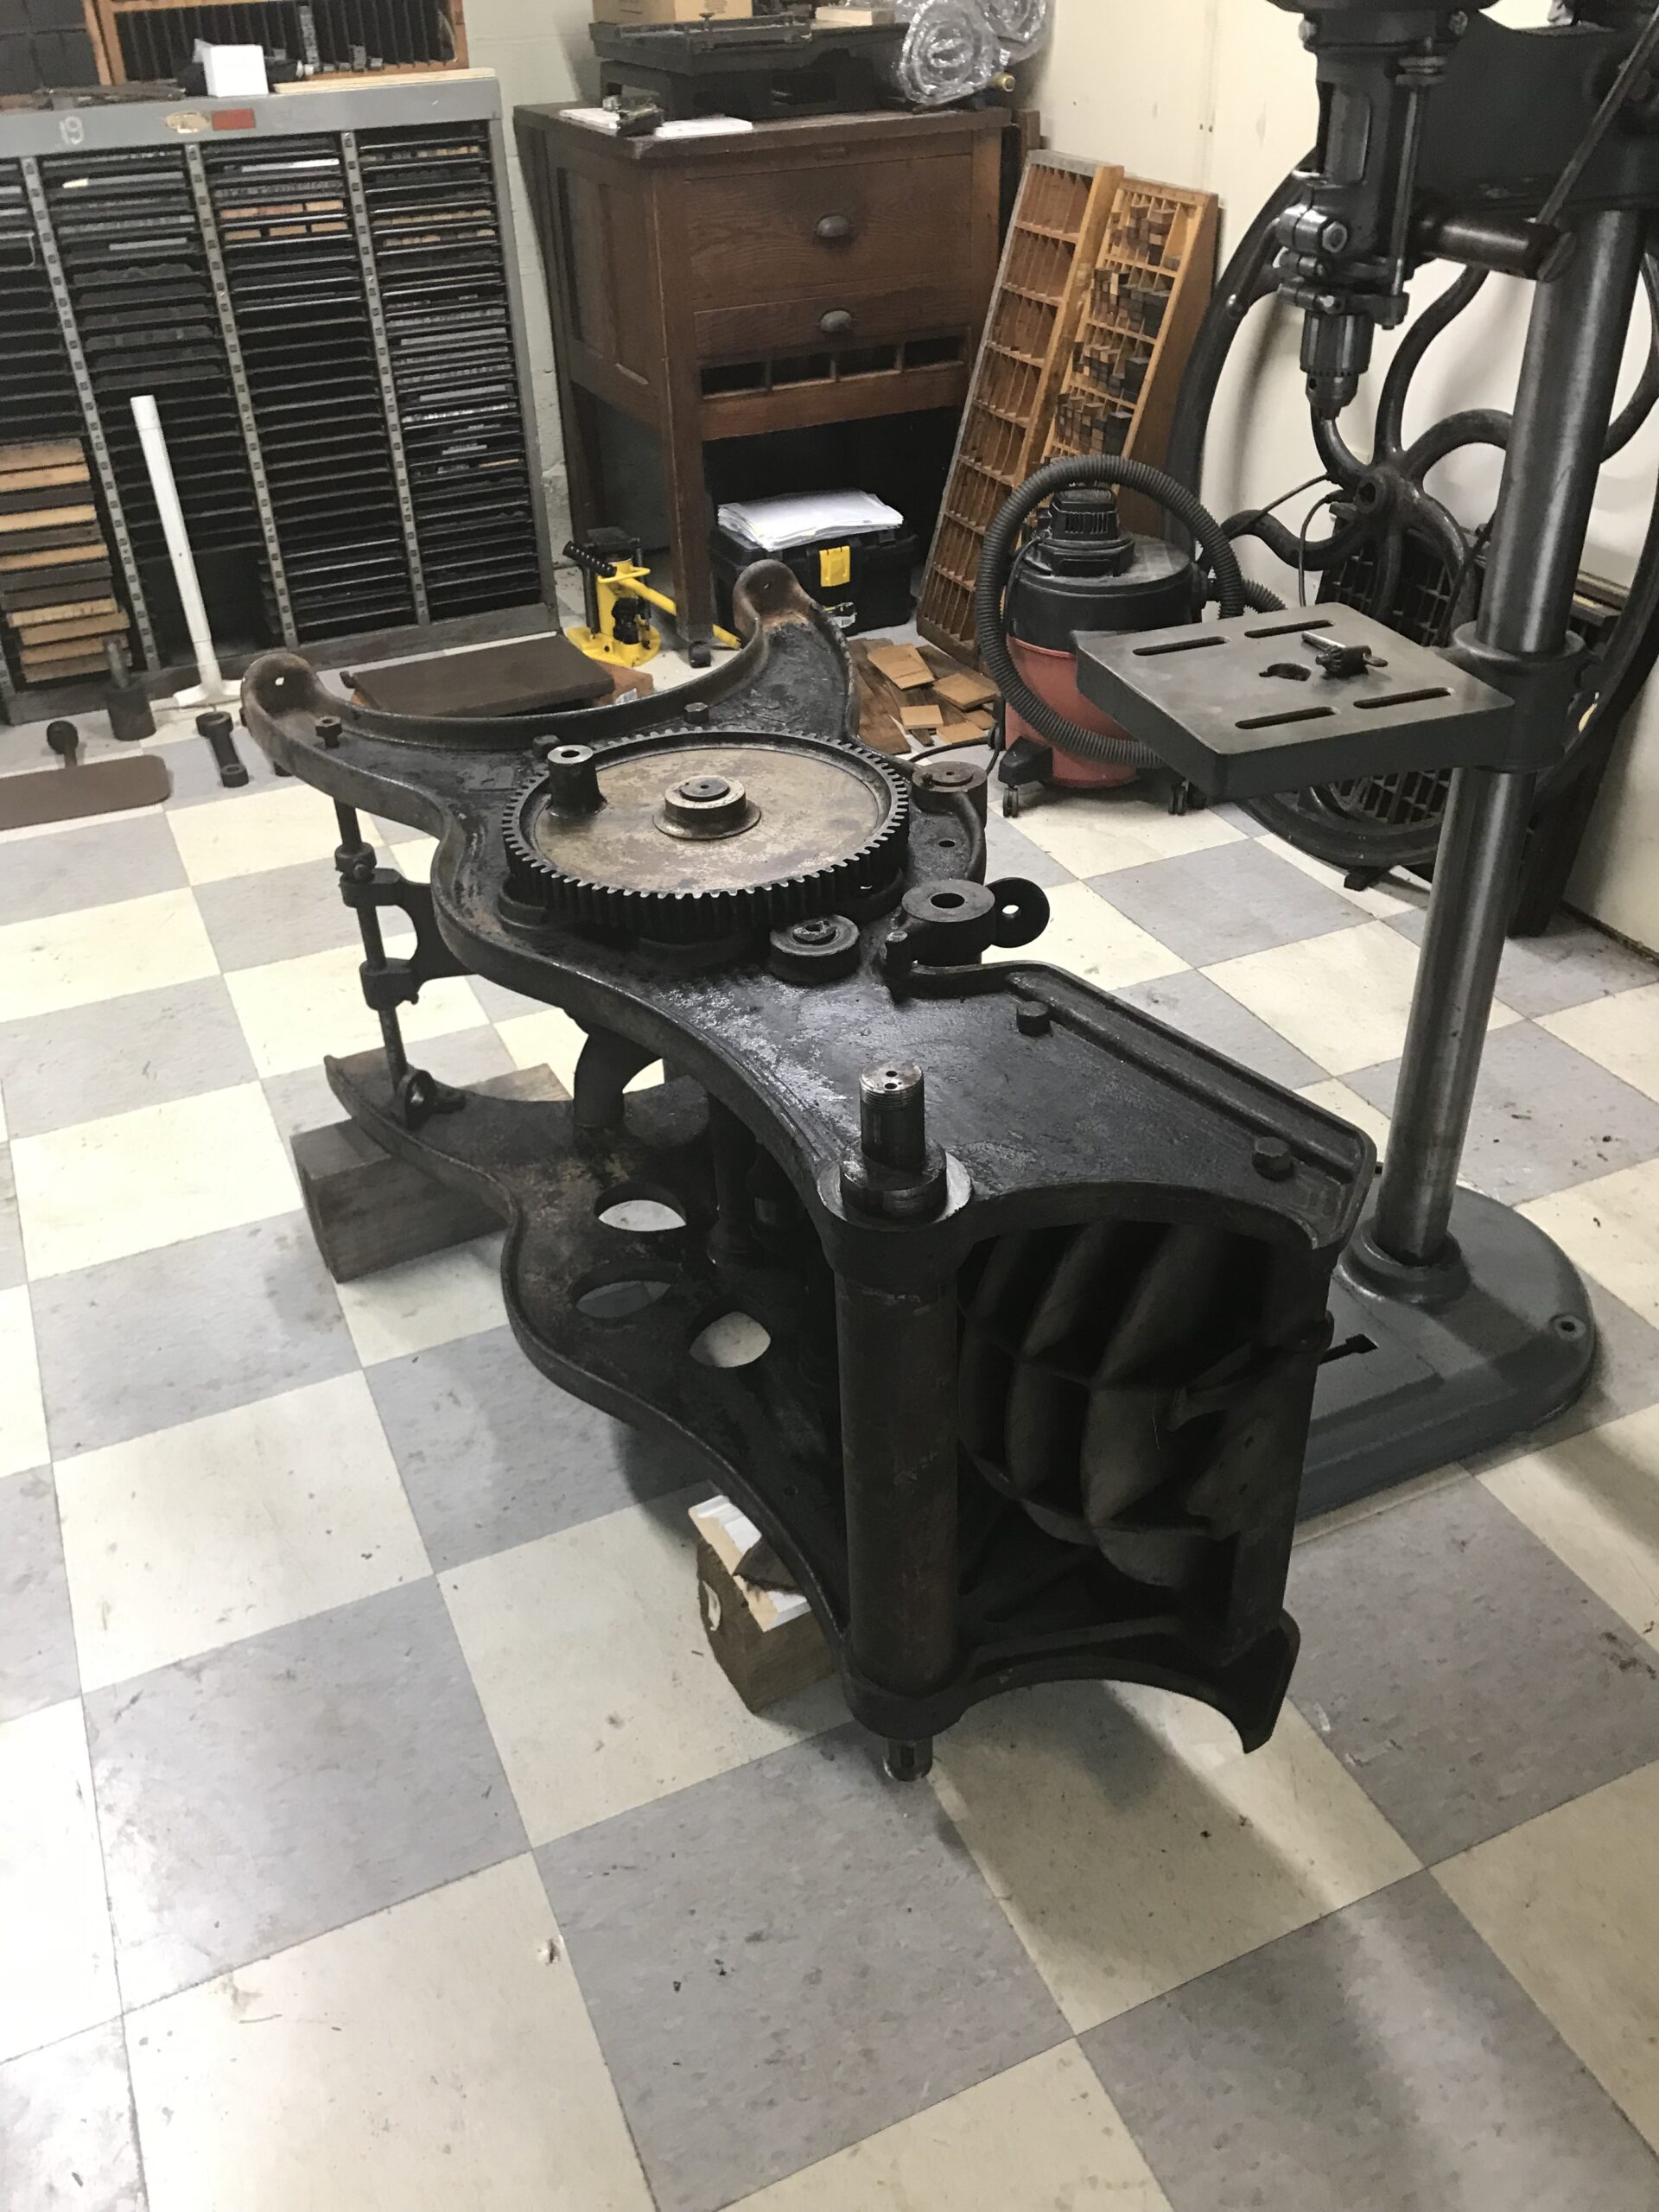
 Once the coupling was removed I could part the two halves of the press
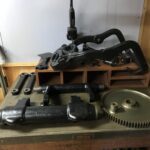
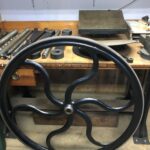 and remove all the internals and go to work on them. There are quite a few parts involved when all is said and done. They all need to be cleaned thoroughly before painting. I use a two step paint process to try to mimic the old finish. Satin clear over semi gloss black while the black is still wet.
I try to avoid painting if at all possible, Unfortunately, most of the original finish was long gone. The press needed protection, so painting was a necessity. I do not like the aesthetics of a press if it looks freshly painted. The goal is to make the press look like a survivor, not a restoration. I cannot always achieve that goal, but, I try.
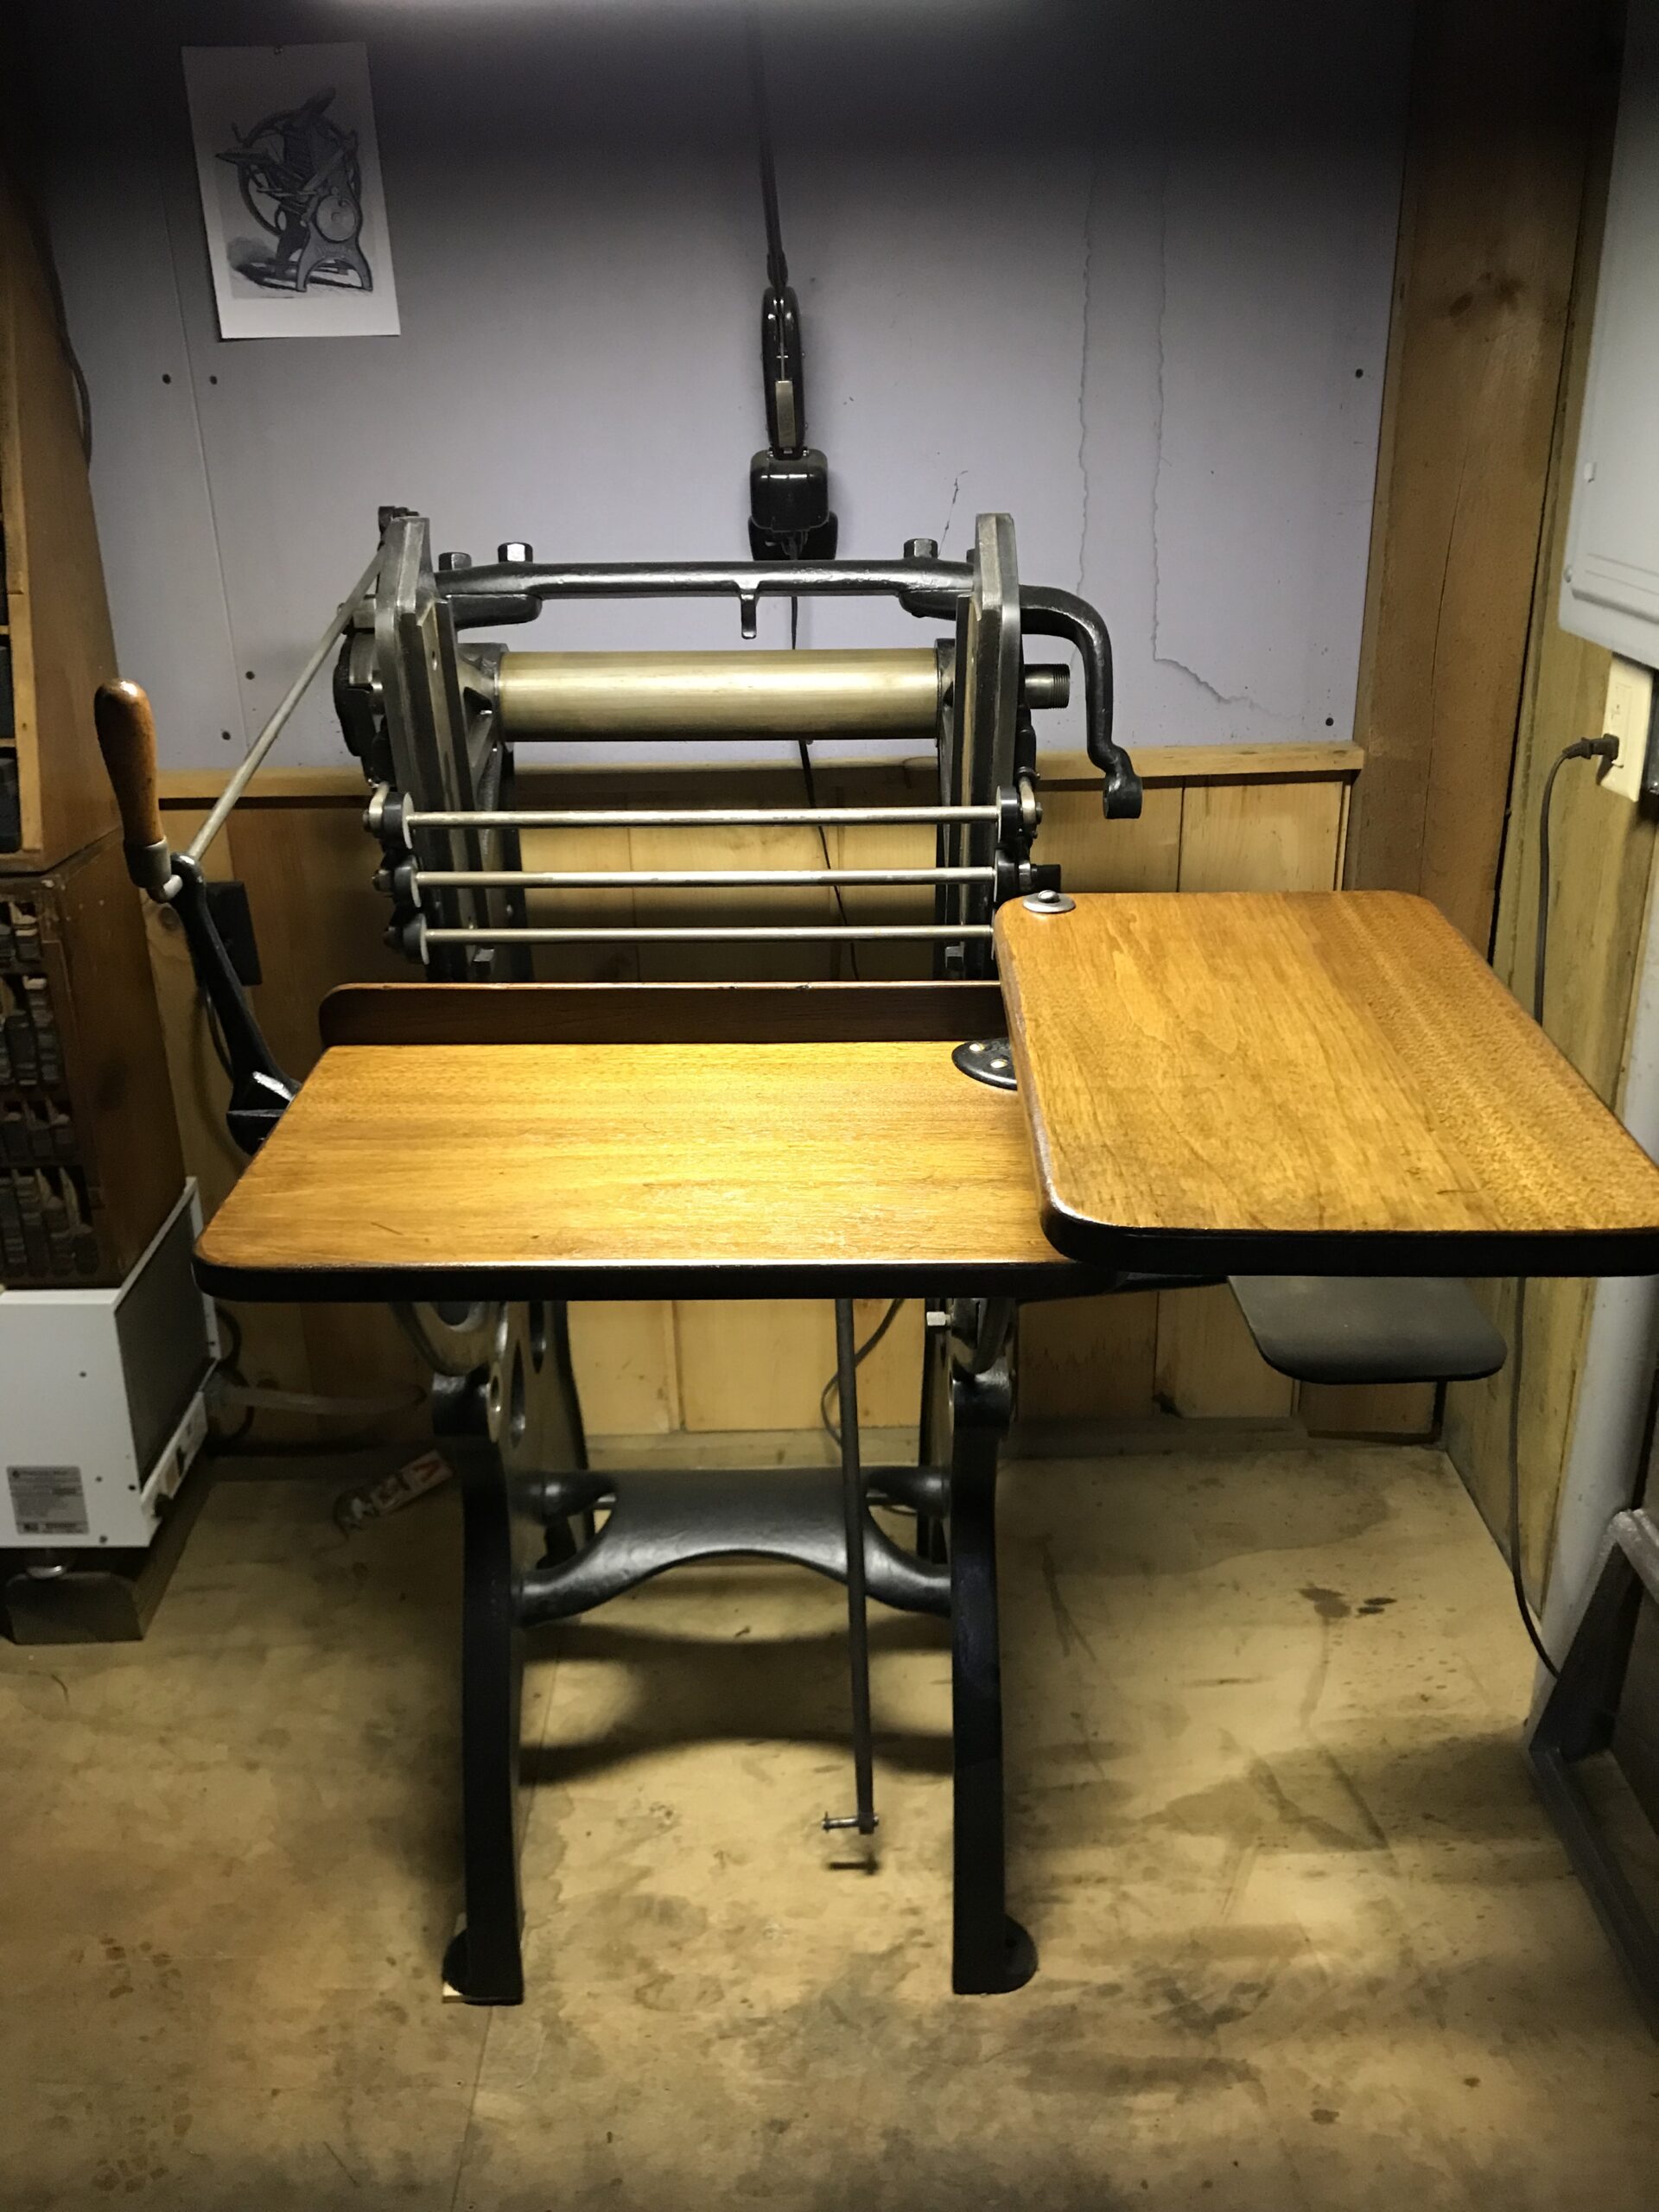
Once I had some paint on the parts and the main body of the press, I reassembled some of it to work on the cores and trucks and some other pieces while I wait on some important parts that are off to my machinist. I had to take measurements for the roller cores before I could begin work on them, as there is no public information about their dimensions available. Not even in the data sheet from Golding I have that shows every other Golding presses roller and core dimension. I also put on the delivery board brackets so I could reproduce the boards that were poorly done replacements of the originals. I tried to match the wood of the throw off handle I had used. I cannot mount them to the brackets yet though as I don’t know where the platen will come until it is installed and that is one of the parts off to the machinist. In this picture you see the new delivery and feed boards, and the cores and trucks installed on the press.
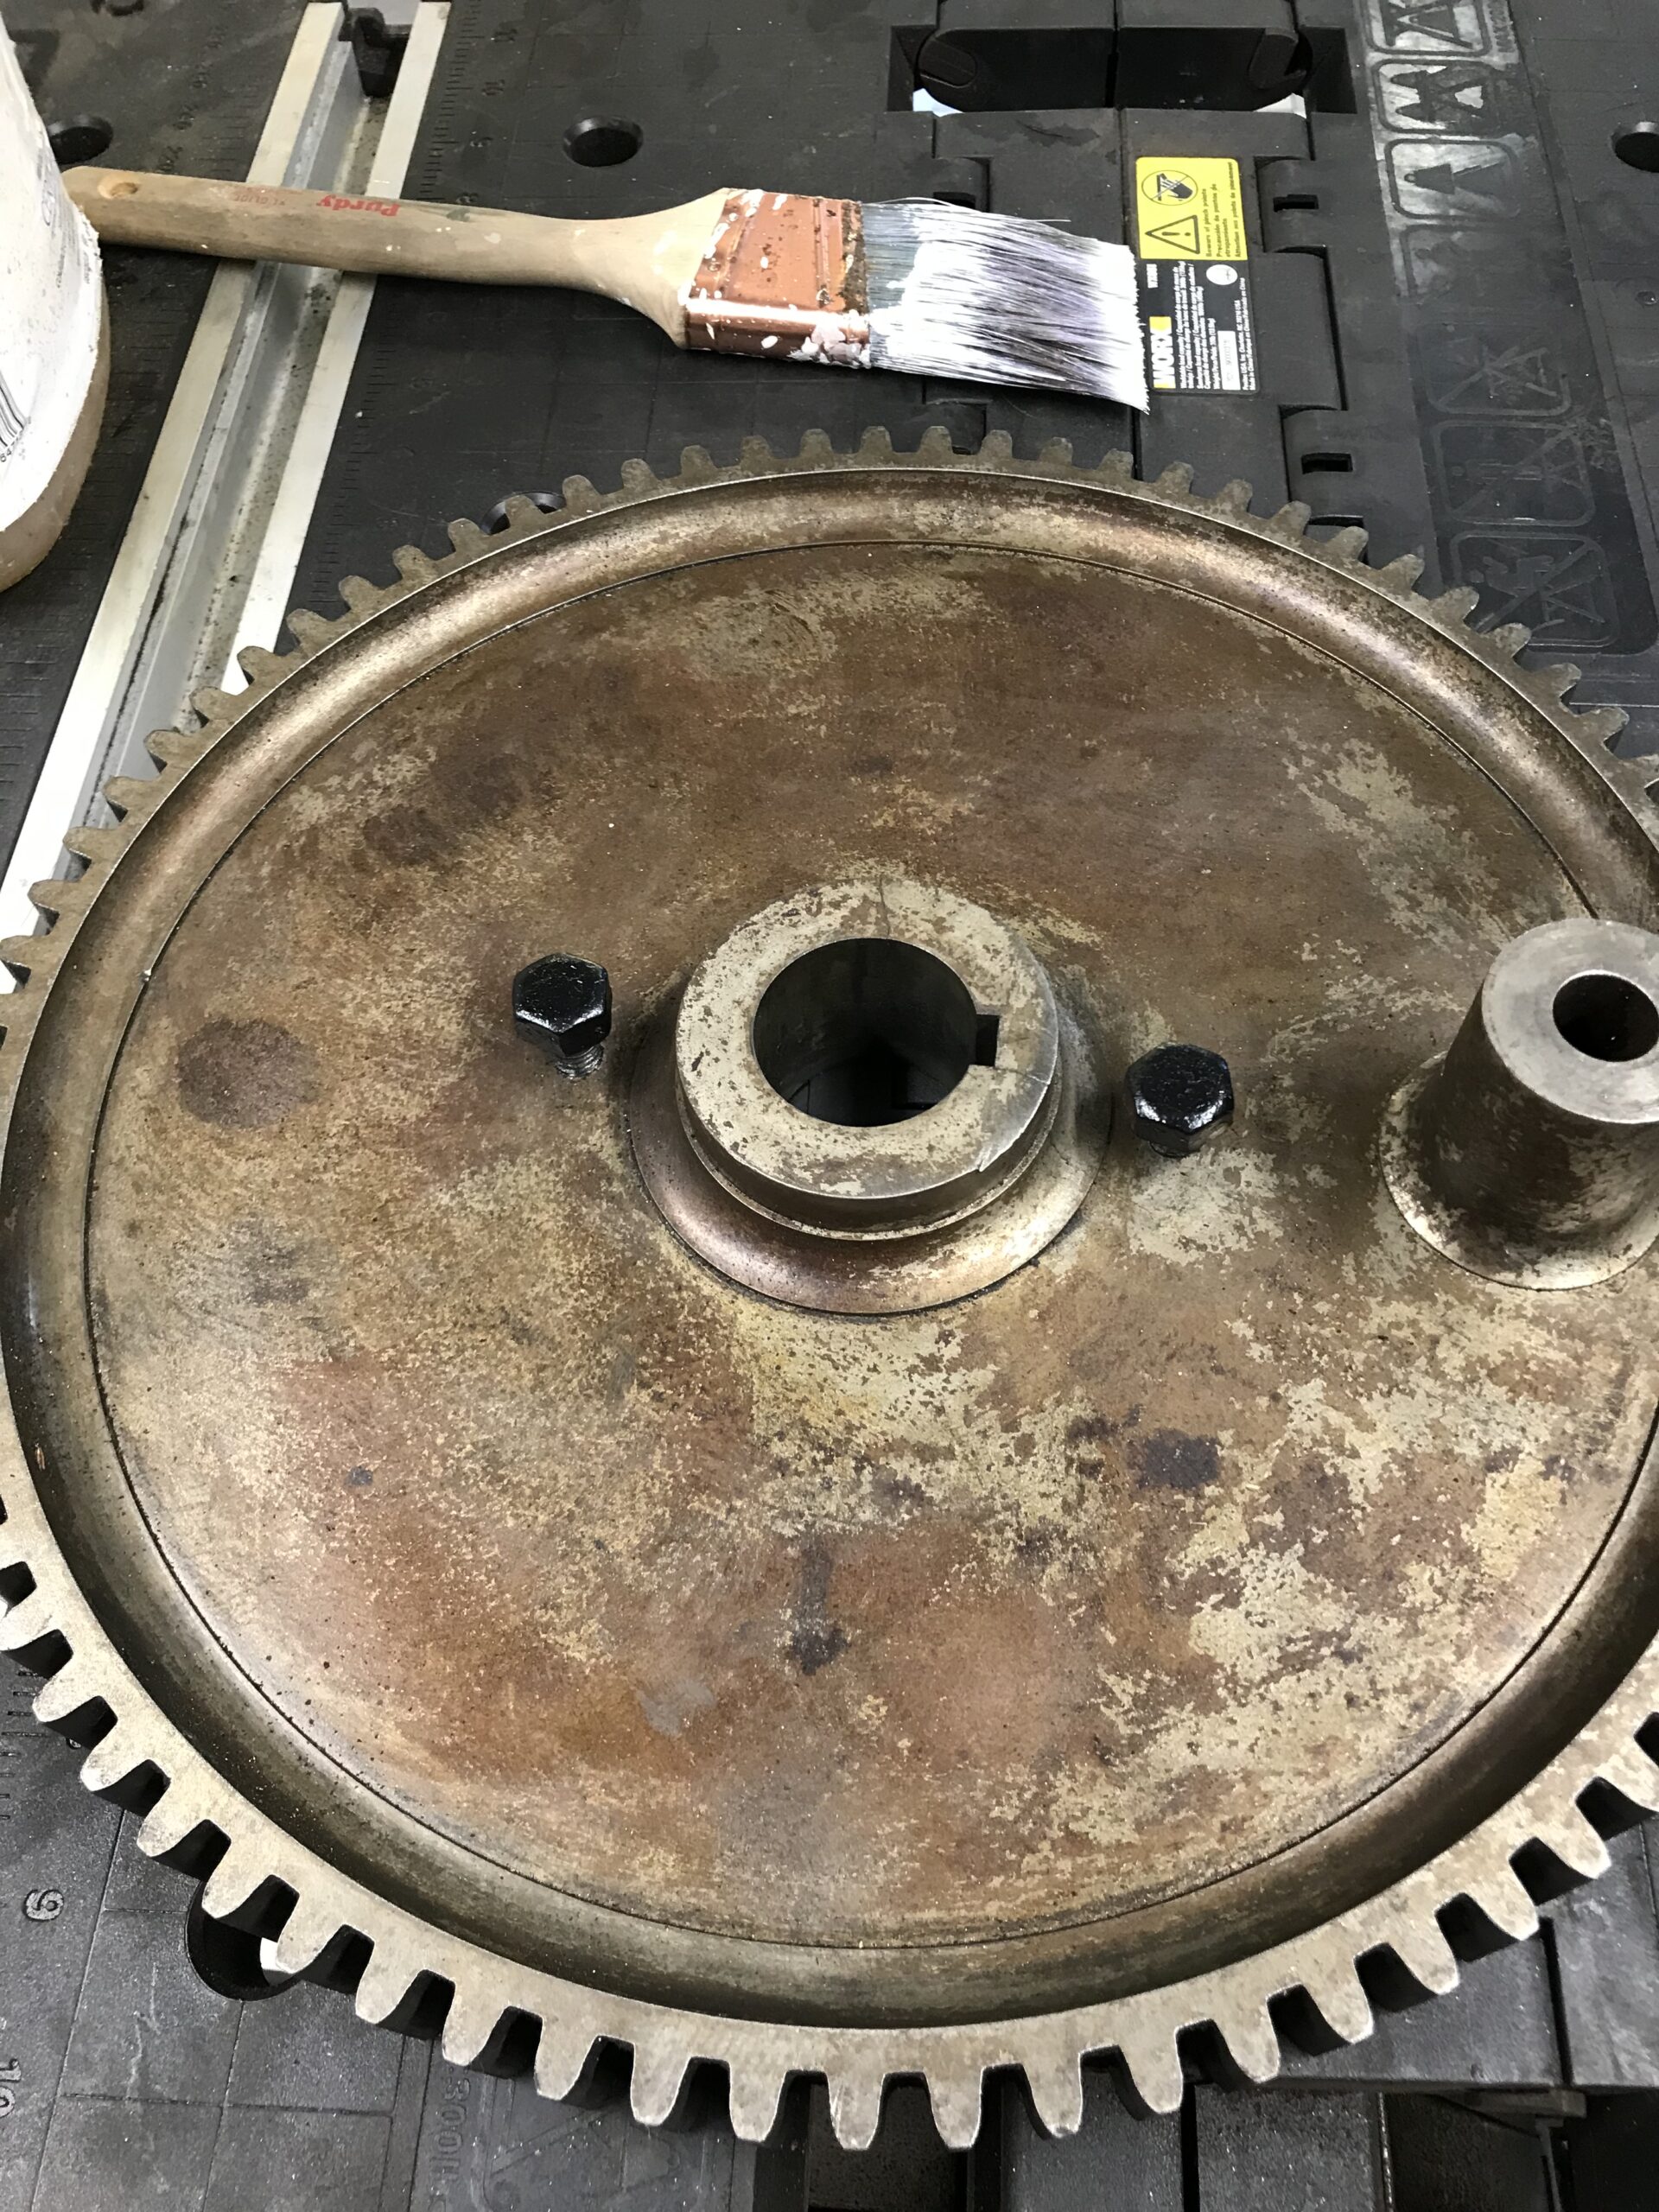
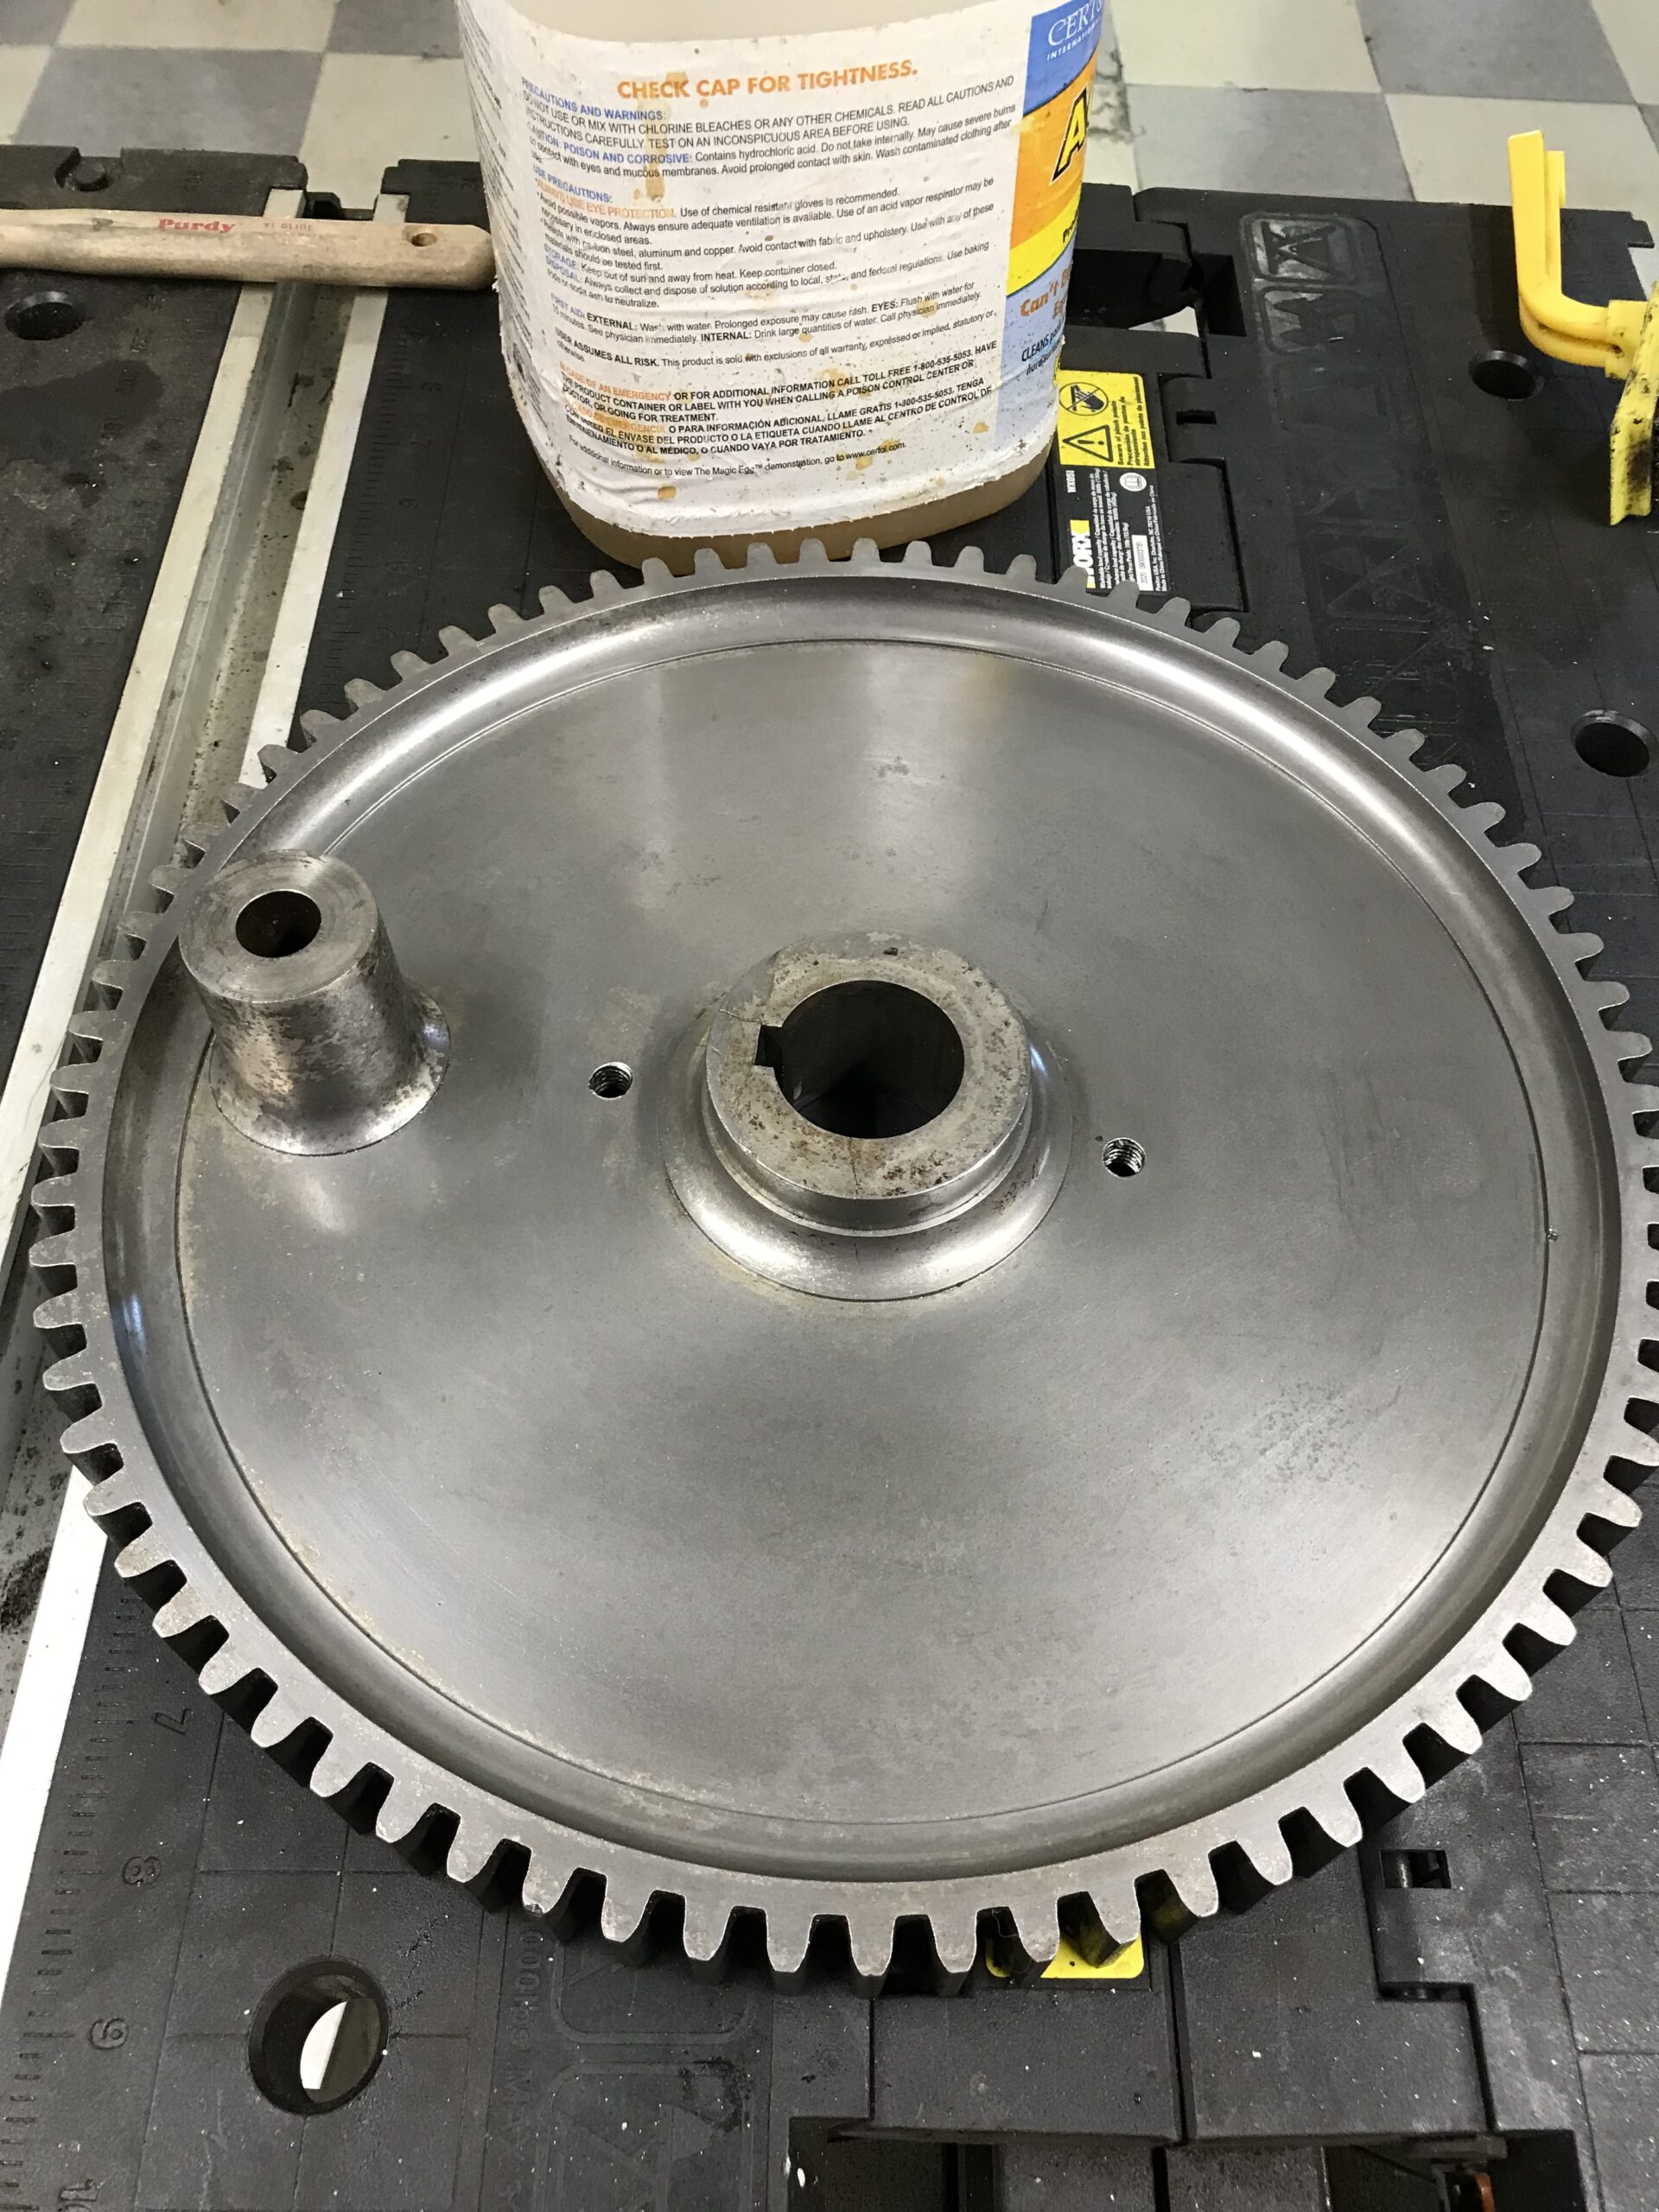
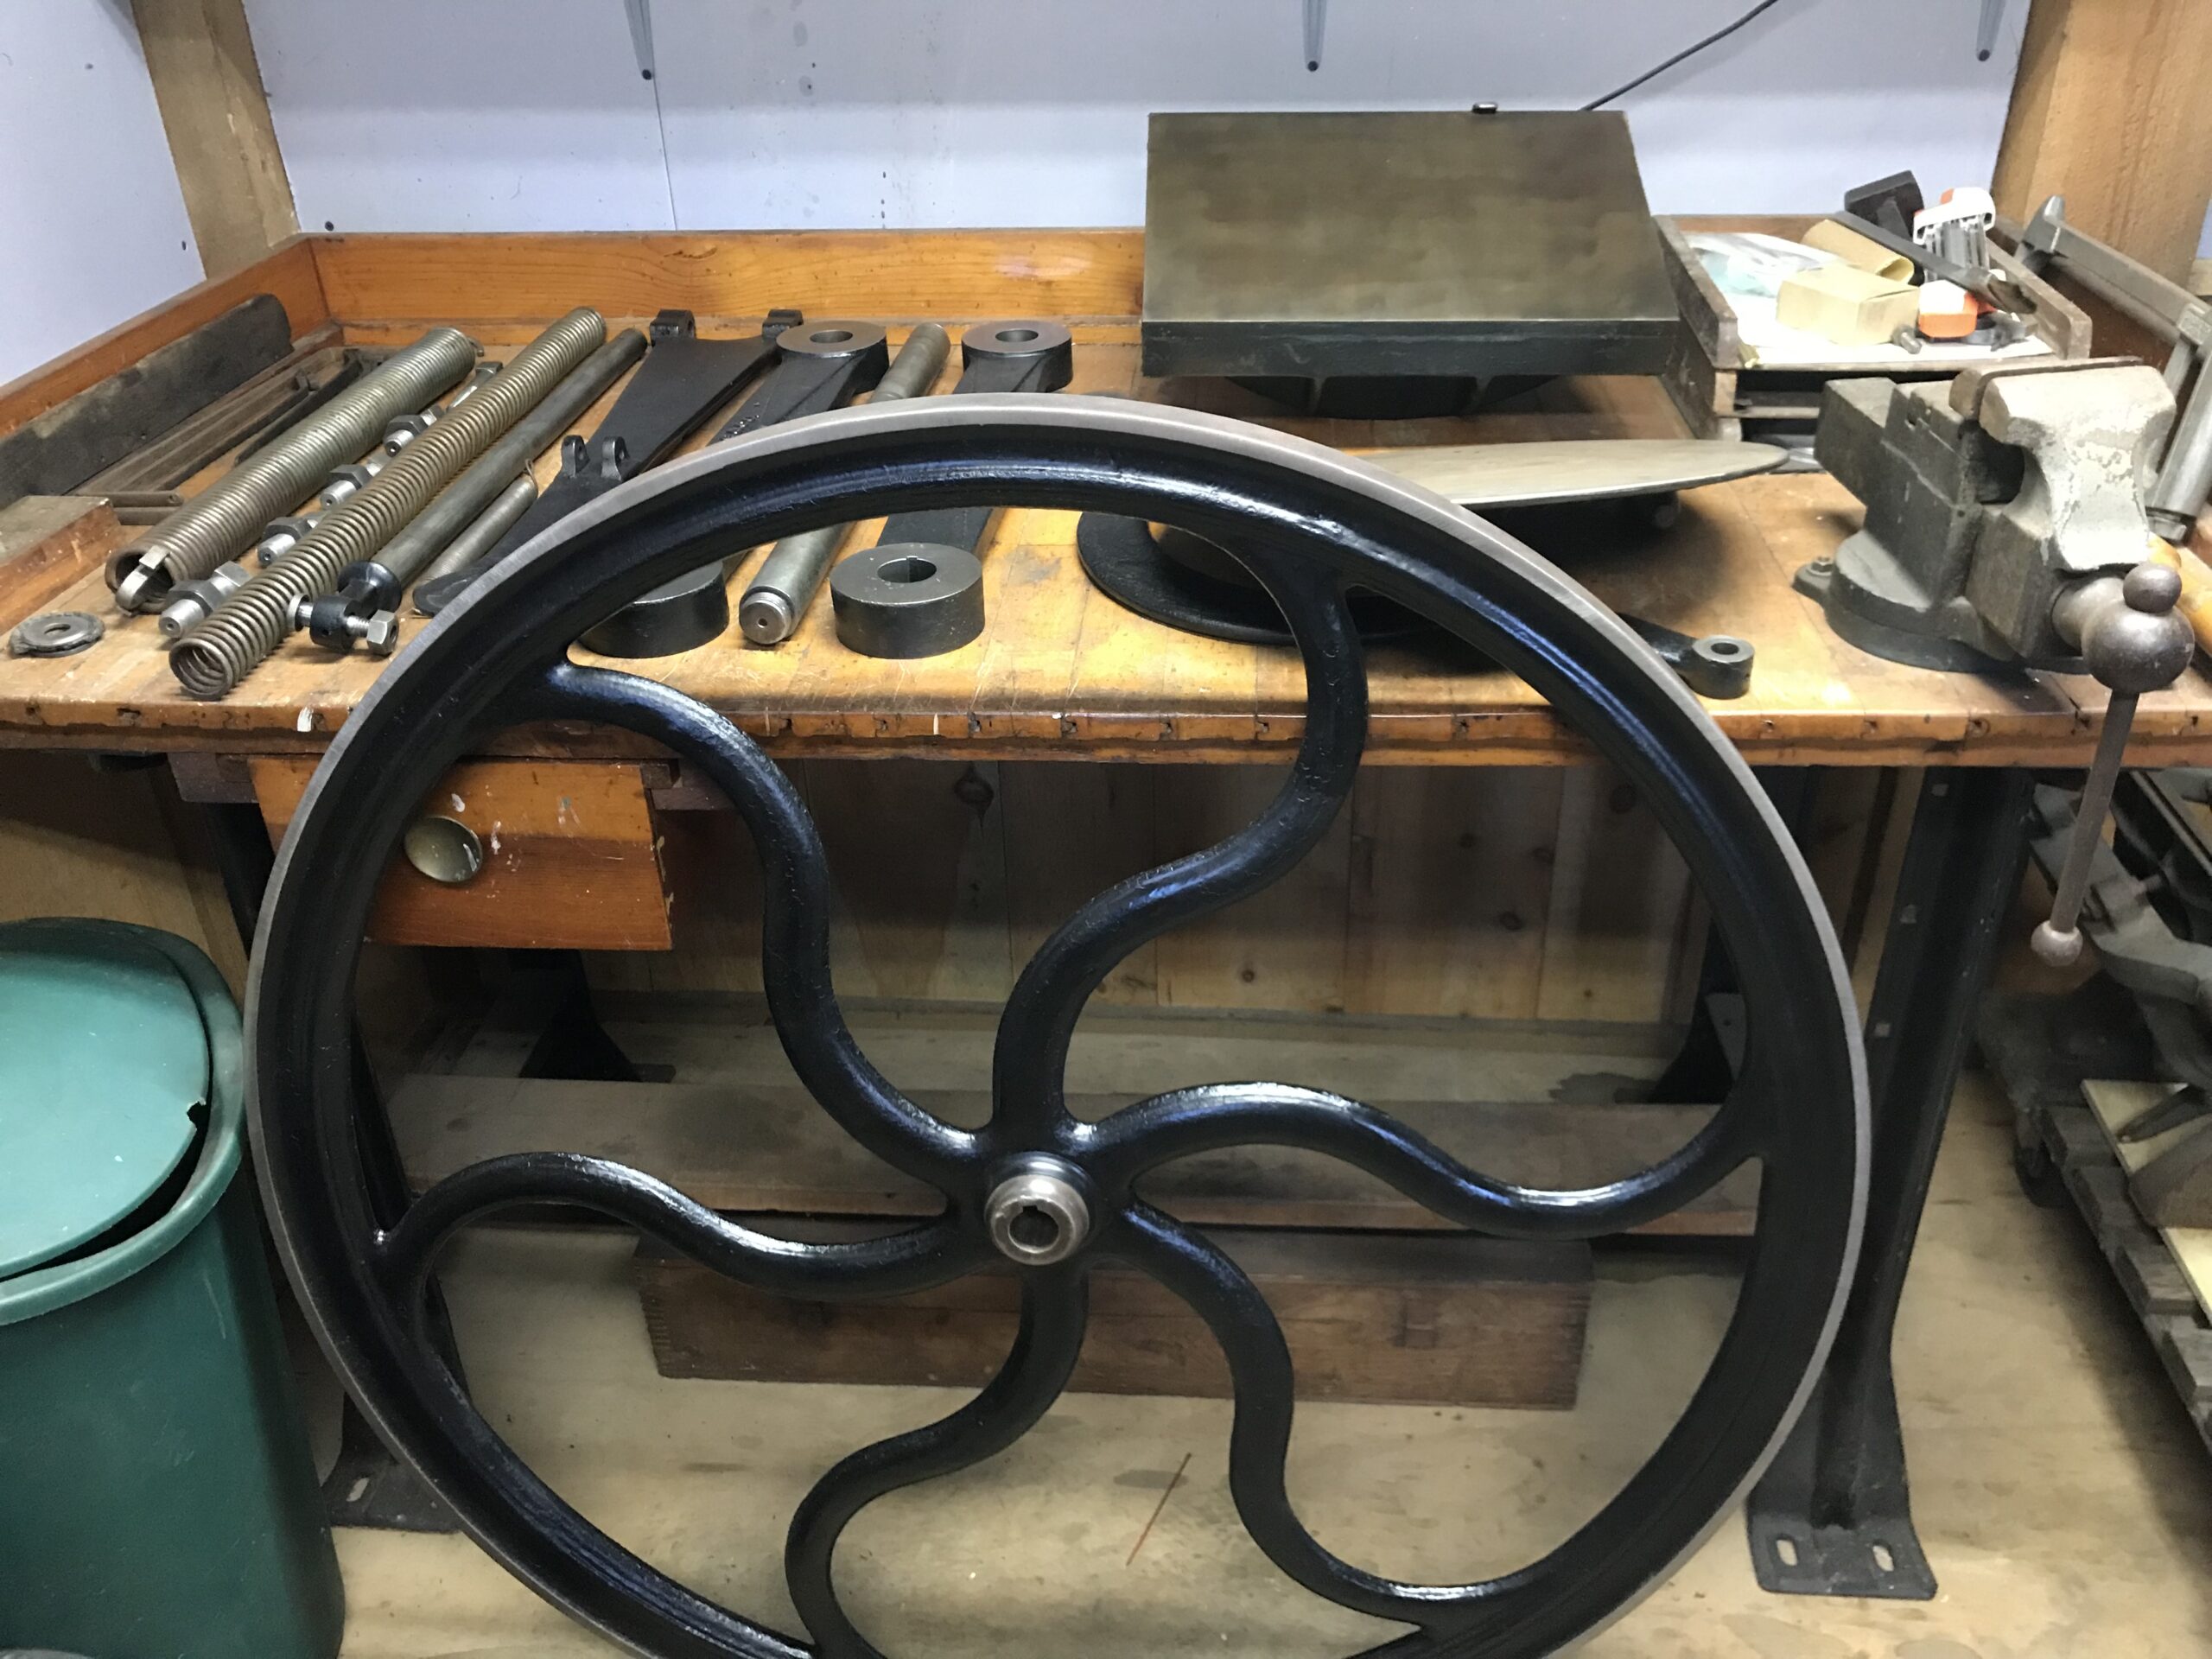
Rust! Removal is a hotly debated topic in the letterpress restoration world. There are many schools of thought. The latest I heard was using molasses. Yes, molasses. It apparently does work but rather slowly. I use several commercial products with my main go to being Evapo Rust. I also use muriatic acid. It depends on many factors. Here is an example of muriatic acid doing an unbelievably good job on the bull gear. This transformation took place in about 5 minutes.
In order to get the bull gear off I had to lay the press down on its side and drill and tap two holes on either side of the center shaft because I do not have a gear puller large enough to handle this 13″ gear. My drill press was just deep enough to get the holes where they should go. The bolts can be seen in the before picture and the holes are visible on the after picture above.
to be continued……….
